Ch 027 / 44
Step 02.07 — Tighten from the centre outward
Step 7 of 44 · Chapter 02 — Z drives, Z idlers, Z rails, deck panel
Tap to enlarge
Parts:
- the first Z rail and its nine started screws · already on the bench
Do:
- Tighten from the middle of the rail outward, alternating up and down. Snug, not gorilla-tight: an M3 into a T-nut will strip.
- If a tight spot shows, back the screws off and re-tighten from the centre.
 Check
With the guides removed, the carriage feels identical at every point over the rail's full length. Any tight spot means the rail is not flush.
What you're looking at
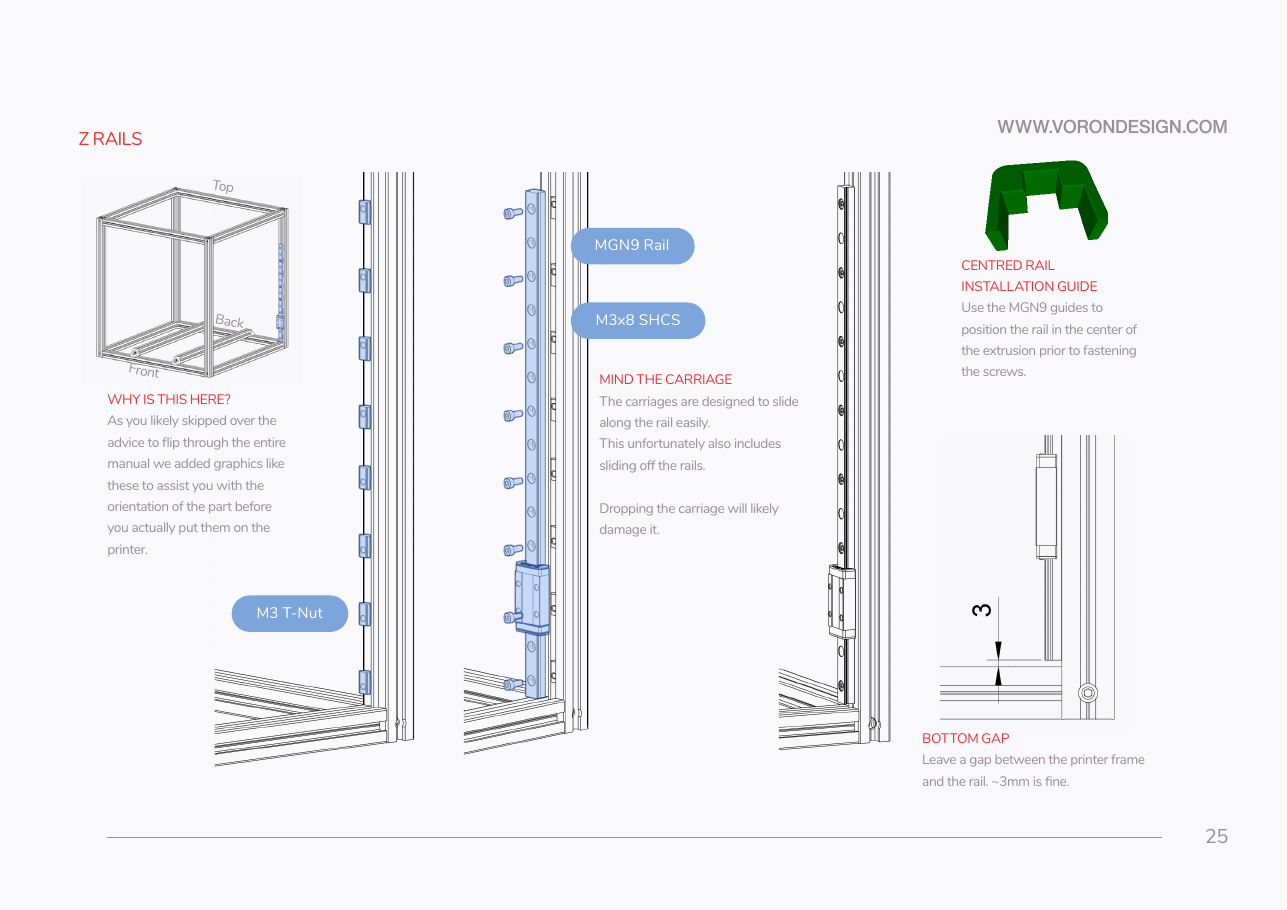
Manual p.25 again: the same rail, now being tightened. Working outward from the middle presses the rail flat against the extrusion. Starting at one end walks a bow along the rail, and a bow is the tight spot you feel later.
Source: Voron manual p.25 · Voron manual p.24