Ch 056 / 48
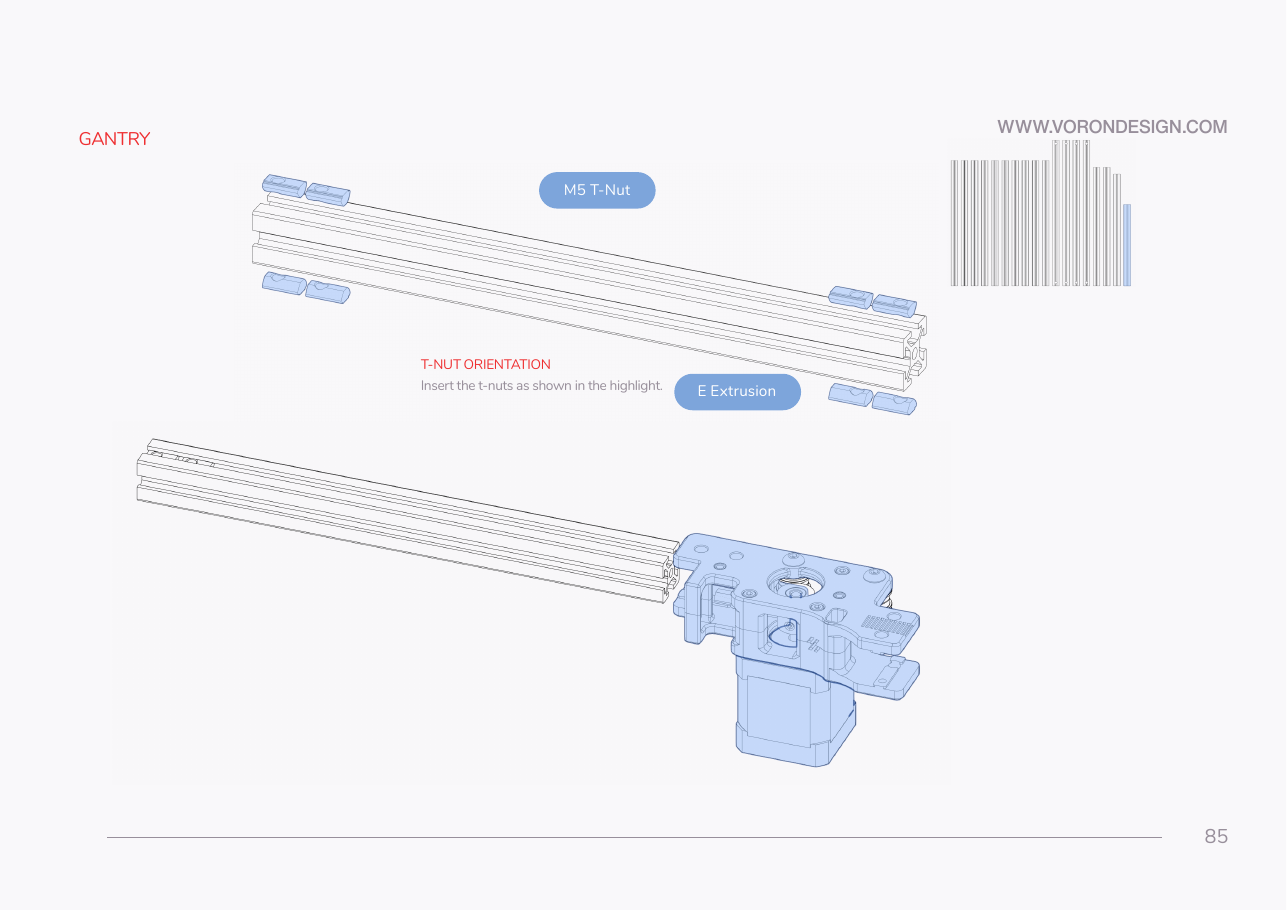
Step 05.6 — Slide the A drive onto the E extrusion
Step 6 of 48 · Chapter 05 — Gantry: X and Y axes, XY joints, X carriage, titanium backers
Tap to enlarge
Parts:
- A drive assembly · already on the bench
- E extrusion with its eight T-nuts · already on the bench
Do: Push the A drive unit onto one end of the E extrusion, motor pointing down. It stays this way up until the flip at Step 05.41. Seat it until the printed part is flush with the extrusion end.
 Check
Plastic flush to the aluminium end face, and the four M5 T-nuts visible through the drive frame's bolt holes.
What you're looking at
The A drive is the right-hand assembly from Ch 04: a stepper motor with its 20 T pulley, wrapped in a printed frame that carries the belt bearing posts. It slides over the end of the bridge extrusion like a sleeve.
Source: Voron manual p.85