Step 06.1 — Confirm the starting state
Step 1 of 42 · Chapter 06 — Z axis (and Chapter 06b — Gantry squaring)
Tap to enlarge
 Gather for this segment — steps 06.1–06.4 (~30 min)
Fasteners, Tools & Misc box
- M5 hex nut ×4
Printed parts
z_joint_upper_x4×4 · bin 06-Z-joints
Tools and consumables
- Gates 2GT open belt, 9 mm wide, four lengths of about 1400 mm
- masking tape
Parts: none.
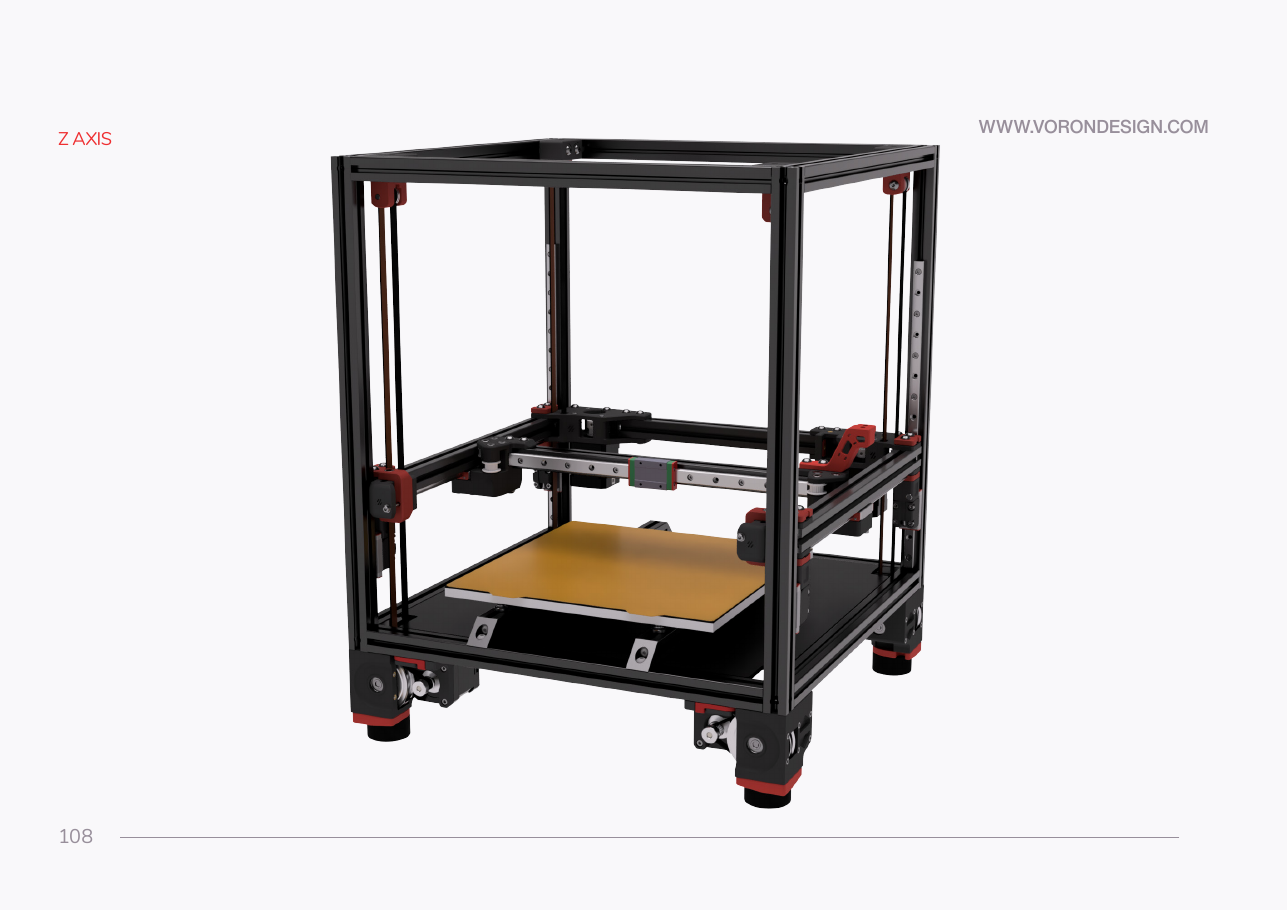
Do: Confirm: four Z drives bolted in; four Z idlers with tensioners at the upright tops; four MGN9 Z rails on the second holes from each end, carriages on and greased; the gantry on the bench with its titanium backers on.
 Check
Every Z carriage slides its full rail by hand, smooth, with no notchiness or gritty spots. Fix a rail that fights you now.
What you're looking at
Manual p.108–123. Nothing in this part needs power.
The frame before the gantry goes in: a Z drive at each bottom corner, a Z idler at the top of each upright, and a Z rail with a carriage on each upright. Those four carriages carry the whole gantry.
Source: Voron manual p.108