Step 06.24 — Square the gantry to the A/B drives and lock the X axis¶
Step 24 of 42 · Chapter 06 — Z axis (and Chapter 06b — Gantry squaring)
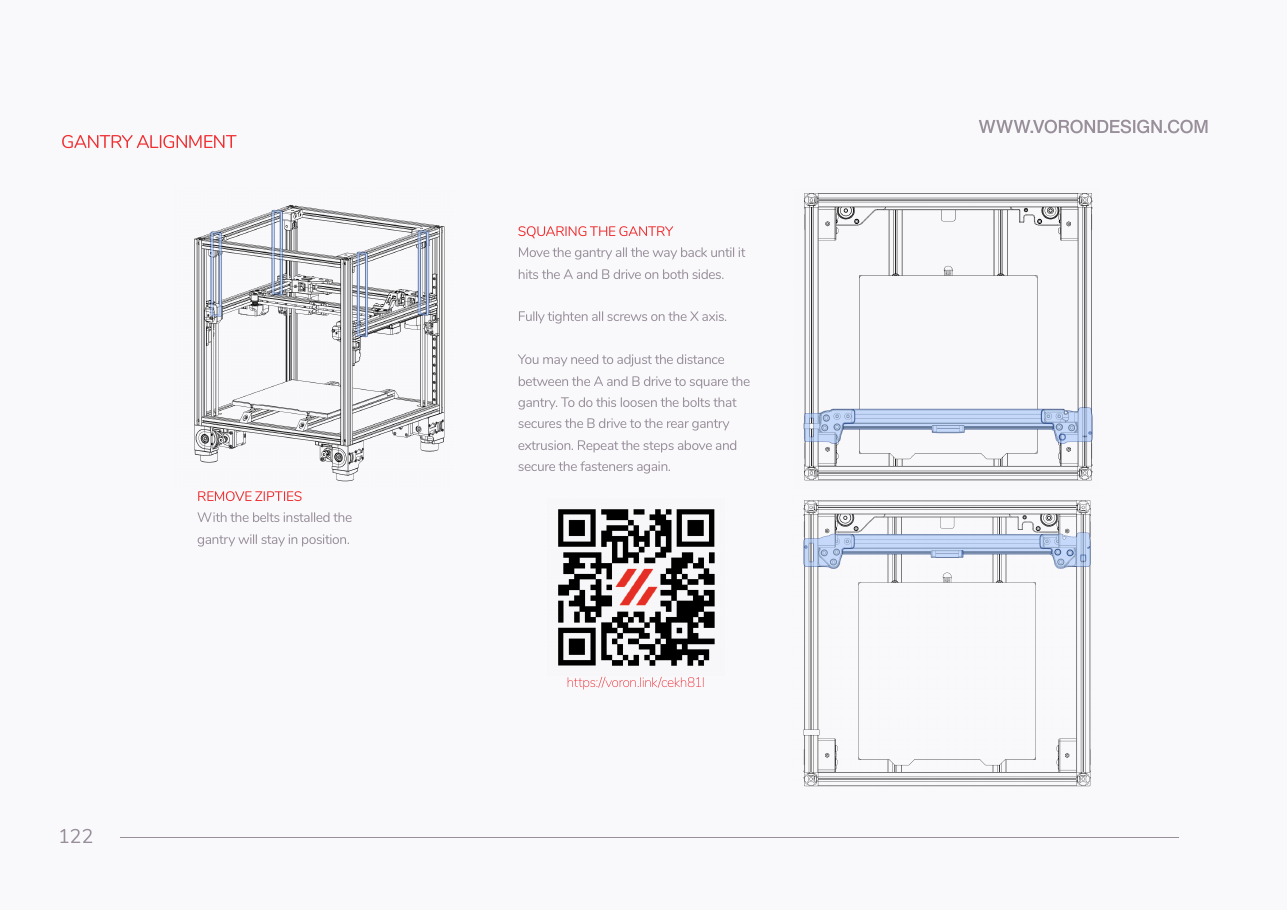
Tap to enlarge
Parts: none.
Do:
- Push the X extrusion back until both X/Y joints hit the A and B drives together.
- Hold it there and tighten the three joint-to-beam bolts at each joint: two BHCS from above, one M5×30 from below.
 Check
Looking down, the X extrusion is parallel to the rear frame extrusion pushed fully back, and to the front extrusion pushed fully forward.
What you're looking at
Pushing the X extrusion back until both XY joints touch their drive units uses the two rear drive blocks as a square. The six bolts you tighten are the three per joint that clamp it to the X beam; no Z belt clamps here.
If one side hits first
Then the A/B drive spacing needs adjusting; p.122 says you may need to. Loosen the bolts securing the B drive to the rear gantry extrusion, push the gantry back until both sides land together, then re-tighten. The bolts you tighten at each joint are the M5×10 (left) / M5×16 (right) BHCS from Step 05.38 and the M5×30 with its black washer from 05.39 — never the Z belt-clamp bolts at the drives and idlers, never the rail screws.
 Tip
This is a mechanical pre-square only. The manual's own QR code on this page (voron.link/cekh81l) points at the full procedure, which is Part B of this chapter.
Source: Voron manual p.122 · Voron docs § V2 Gantry Squaring · CAD: Voron 2.4r2 STEP @ de7e89d · Video: Part 6 @1:34:55