Step 05.10 — Load M3 T-nuts for the first Y rail¶
Step 10 of 48 with a helper · Chapter 05 — Gantry: X and Y axes, XY joints, X carriage, titanium backers
Tap to enlarge
 Gather for this segment — steps 05.10–05.12 (~30 min)
Fasteners, Tools & Misc box
- M3 T-nut ×9
- M3×8 SHCS ×9
Linear Rail Kit box
- MGN9H 400 mm rail ×1
Frame Kit 2.4-350 box
- C extrusion ×1
Tools and consumables
MGN9_rail_guide_x2jig ×2 · bin 00-jigs
Already on the bench
- M3×8 SHCS ×9
Parts:
- C extrusion ×1 · Frame Kit 2.4-350 box
- M3 T-nut ×9 · Fasteners, Tools & Misc box
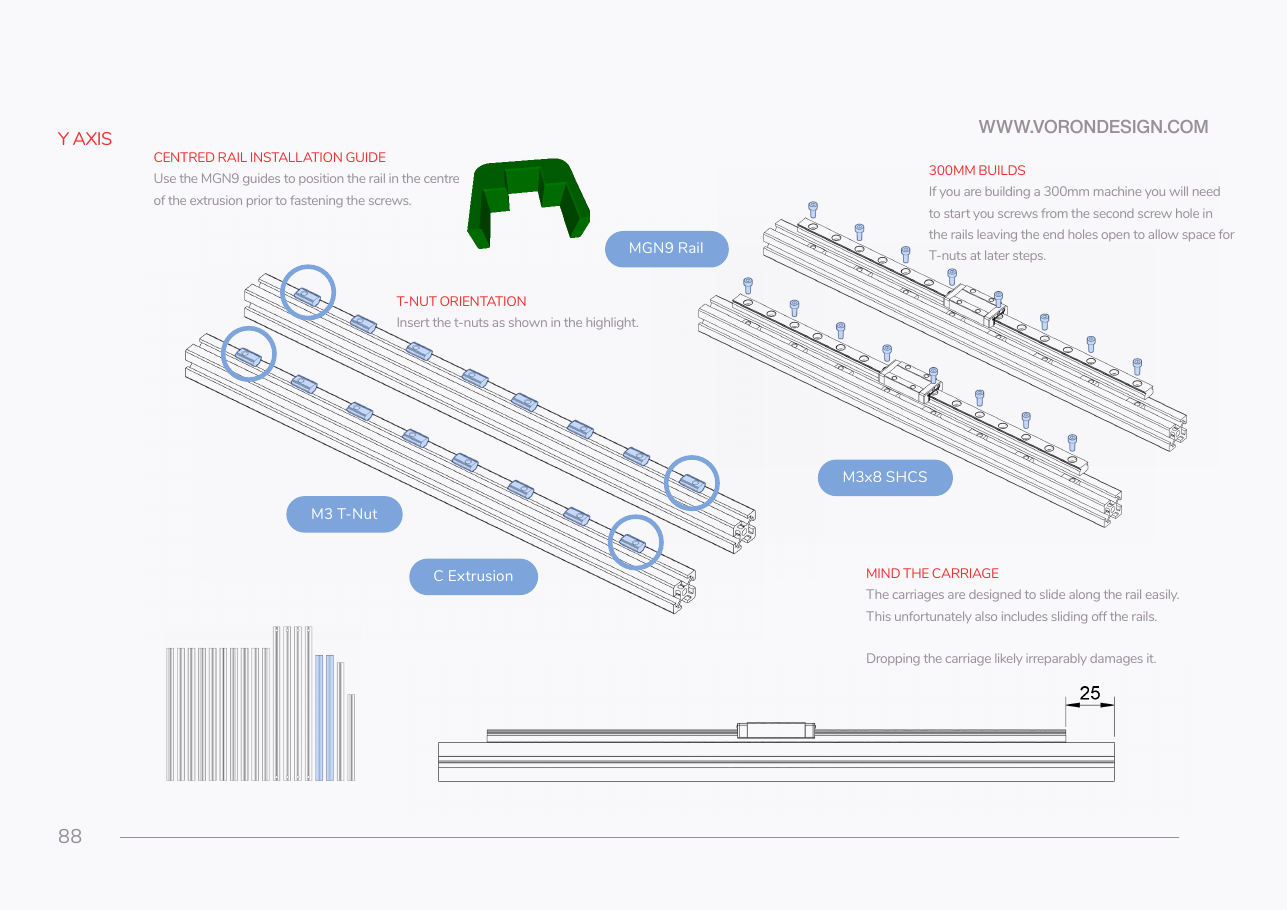
Do: The 400 mm MGN9H LDO-SLR9H-400Z0 has 20 holes. Mark holes 2, 4 … 18: every other hole from the second, so both end holes stay open, as p.88 asks. Slide in 9 M3 T-nuts, ~25 mm clear of each end.
 Check
9 nuts, one per marked hole, all rolled flat in the channel; holes 1, 19 and 20 unmarked; ~25 mm clear at both ends.
 Helper Counts nine T-nuts into the slot and checks one sits under each marked hole.
What you're looking at
The two C extrusions are the Y axes, the side rails the X beam slides along. Each carries an MGN9 linear rail on one face. The M3 T-nuts anchor every rail screw; once the rail is down, no more can go in.
Source: Voron manual p.88 · LDO Build Notes § Voron 2.4 build FAQ