Step 05.11 — Centre and start the first MGN9 rail¶
Step 11 of 48 with a helper · Chapter 05 — Gantry: X and Y axes, XY joints, X carriage, titanium backers
Tap to enlarge
Parts:
- MGN9H 400 mm rail ×1 · Linear Rail Kit box
- M3×8 SHCS ×9 · Fasteners, Tools & Misc box
-
MGN9_rail_guide_x2jig ×2 · tool
Do:
- Tape the carriage mid-rail; peel the Ch 00 end-stop bands off with the rail flat.
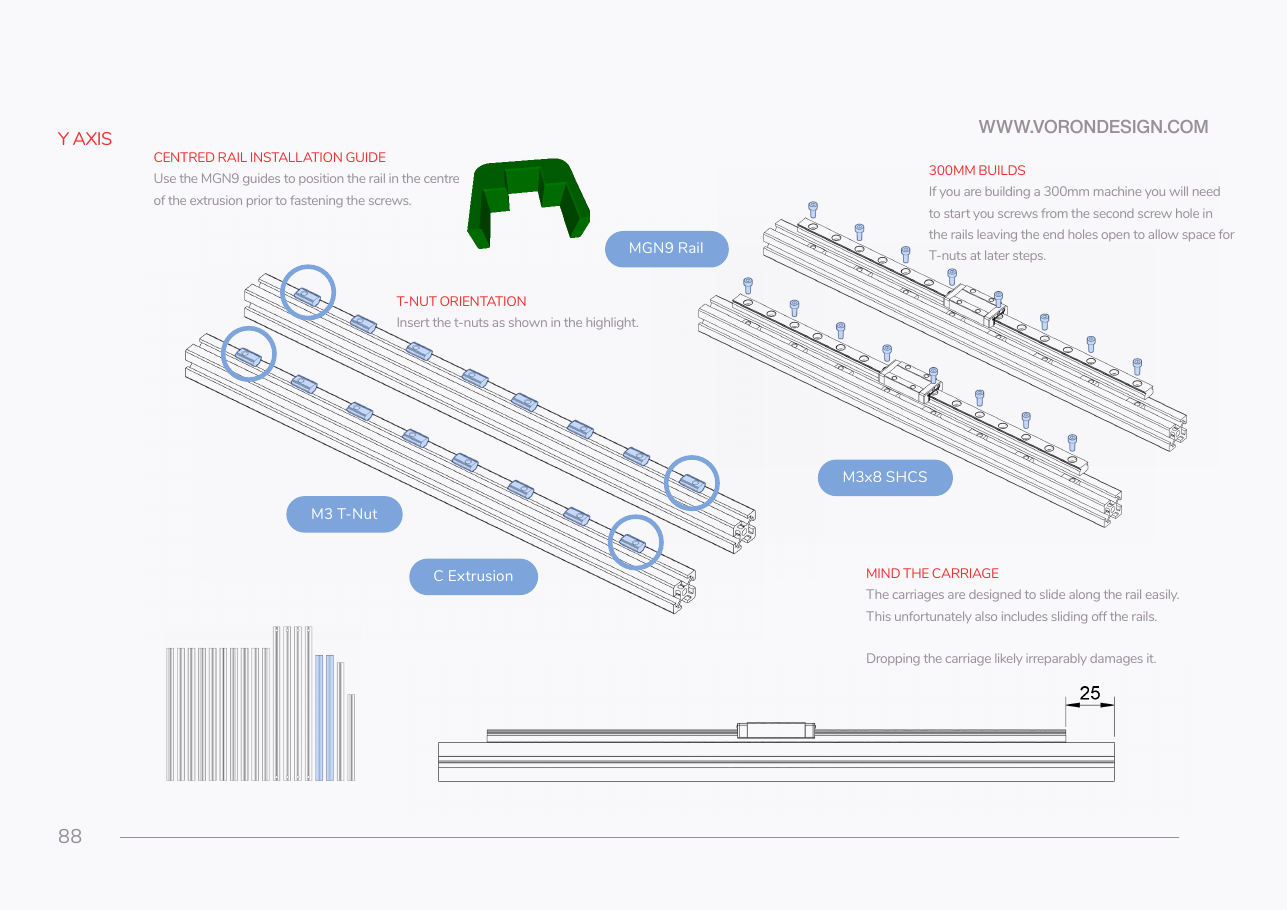
- Sit the rail on the extrusion, centred by an MGN9 guide at each end.
- Start holes 2 and 18, then the rest.
 Check
Rail centred by both jigs; 25 mm from extrusion end to rail end, measured equal at both ends.
 Helper Holds both rail jigs steady on the extrusion while you start holes 2 and 18.
What you're looking at
An MGN9 rail is a hardened steel guide with a recirculating-ball carriage riding on it. The two printed guides are U-shaped clips that straddle rail and extrusion and hold the rail dead-centred while you start the screws.
Caution
Rev D+ / LDO: "Do not use the holes on the ends of the rails, use the second ones from the ends." src — the manual only requires this on 300 mm builds; LDO requires it on every build, because the end holes sit over the M5/M3 nuts of Step 05.14, which share the rail's slot.
Source: Voron manual p.88 · LDO Build Notes § Voron 2.4 build FAQ · LDO rail-grease guide · Video: Part 3 @1:34:58