Step 05.12 — Tighten the first Y rail
Step 12 of 48 · Chapter 05 — Gantry: X and Y axes, XY joints, X carriage, titanium backers
Tap to enlarge
Parts:
- M3×8 SHCS ×9 · already on the bench
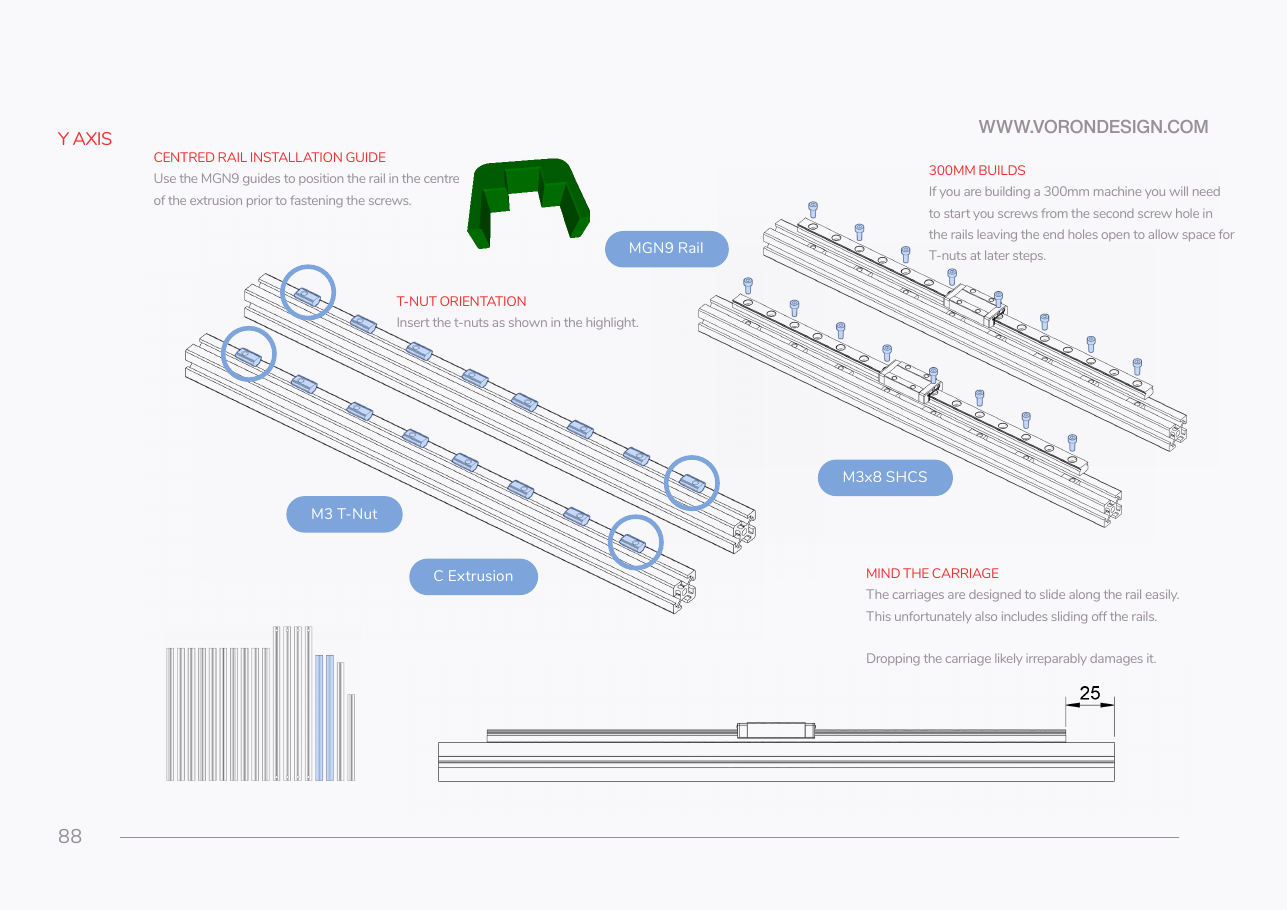
Do: Run every screw finger-tight, re-check the jigs at both ends and the middle, then tighten from the centre outwards in two passes. No torque is specified: firm and even, not maximum. Re-fit a jig afterwards to confirm nothing walked.
 Check
No gap under the rail; the jig slides on at both ends and mid-span; the carriage runs the full length freely.
What you're looking at
The same rail, pulled flat onto the extrusion. Tightening from the centre outwards pushes any bow out to the free ends instead of trapping it in the middle. A rail screwed down bowed is a tight spot the carriage hits on every pass.
 Good stopping point · ~30 min since the last one
first Y rail centred, all its M3×8 screwed down, carriage still on. Tape or stopper the carriage before you walk away.
Source: Voron manual p.88 · LDO rail-grease guide