Step 05.3 — Pick the cable-chain bridge
Step 3 of 48 · Chapter 05 — Gantry: X and Y axes, XY joints, X carriage, titanium backers
Tap to enlarge
Parts:
-
[a]_xy_joint_cable_bridge_2hole.stl×1 (blue) · bin 05-XY
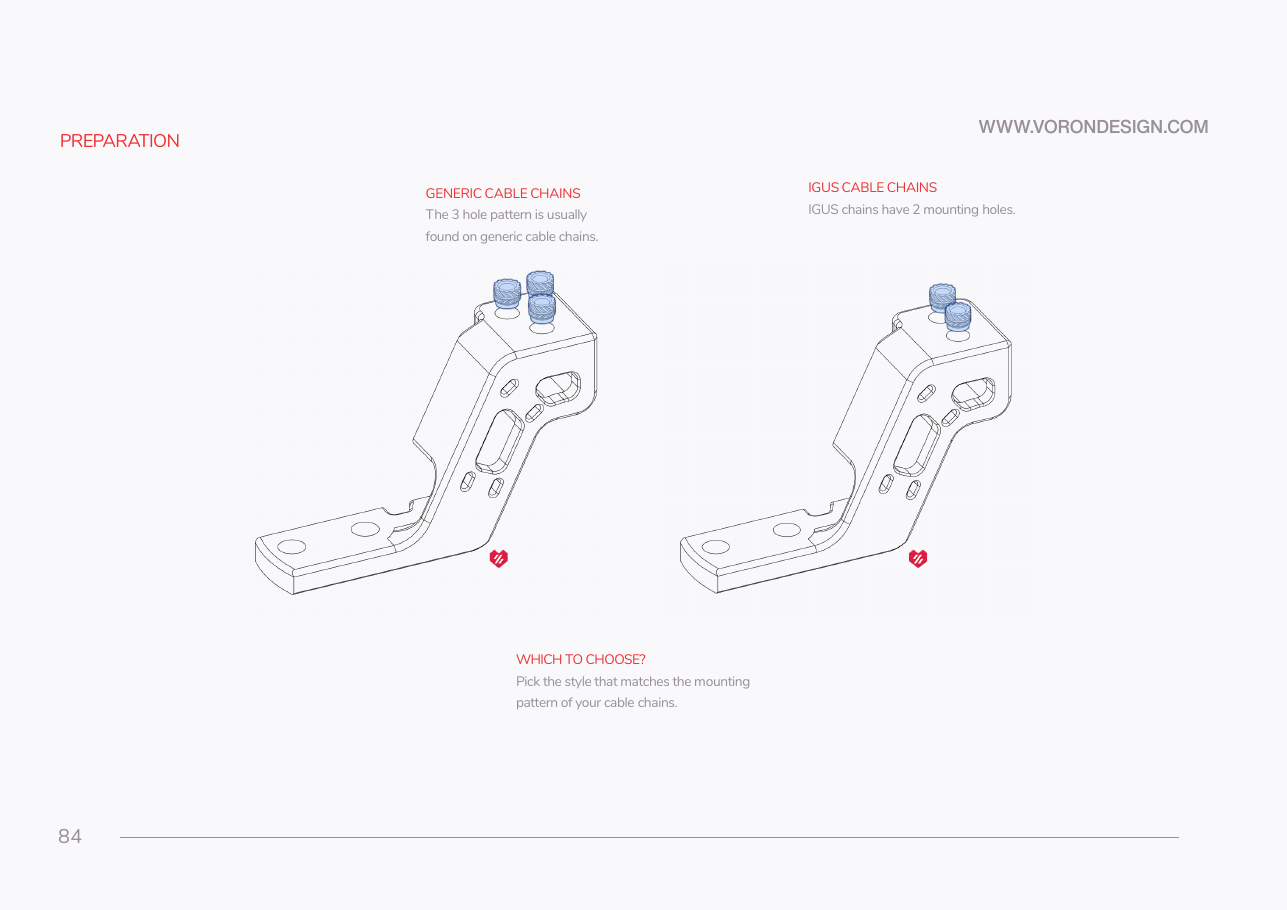
Do: You printed the 2-hole bridge and its raised alternate on plate B02-P3, and no 3-hole part. Confirm the bridge has two holes on the raised pad. Set it beside the raised alternate.
 Check
One 2-hole bridge on the bench, one raised alternate beside it; no 3-hole part exists in this build.
What you're looking at
The cable bridge is the blue arch on top of the right XY joint, lifting the toolhead's drag chain clear of the belts. The two versions differ in the end-link hole pattern: three for generic chains, two for the IGUS chains this kit ships.
Caution
Rev D+ / LDO: "Our cable chain ends use the 2 hole configuration. When printing parts that interface with cable chains, always use the 2hole version instead of 3hole (e.g. xy_joint_cable_bridge_2hole instead of xy_joint_cable_bridge_3hole)." src
 Tip
keep XY_cable_chain_bridge-Igus-3mm_backer.stl beside it — same 2-hole pattern, raised ~3 mm for a backer. The backers' chain-end holes are pilot only: drill 2.5 mm, tap M3. src
Source: Voron manual p.84 · LDO printed-parts guide (Rev D) · Ti extrusion-backers README (tanaes) · Video: Part 3 @1:43:24