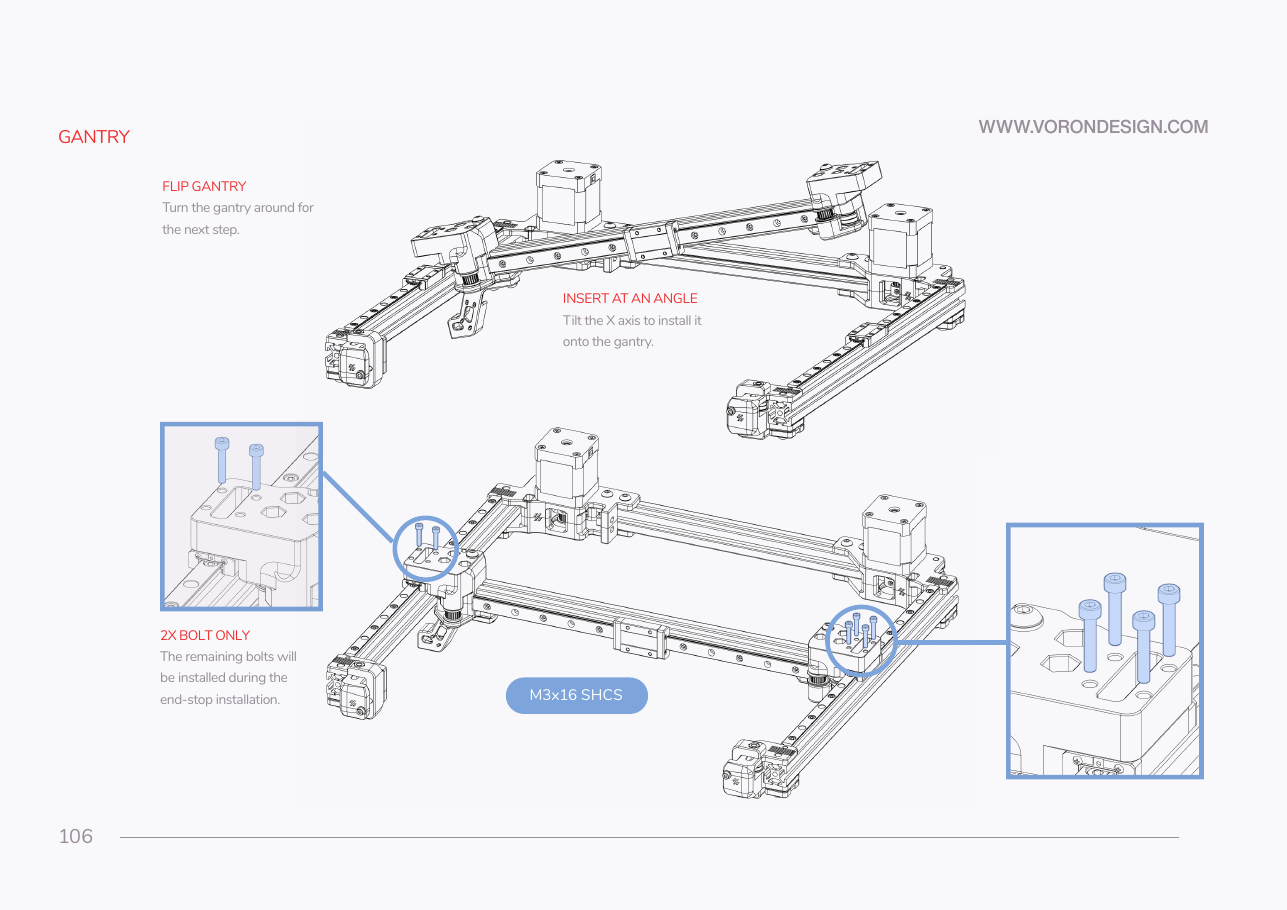
Step 05.42 — Insert the X axis at an angle
Step 42 of 48 with a helper · Chapter 05 — Gantry: X and Y axes, XY joints, X carriage, titanium backers
Tap to enlarge
Parts:
- the X axis assembly · already on the bench
Do: Tilt the X axis in, one joint onto its Y carriage then the other. The right joint, with the cable bridge, goes on the A drive axis, on your left with the gantry inverted.
 Check
Both joints square on their carriages, bolt holes lined up, nothing fouling the Y extrusion; the MGN12 rail faces the idler end.
 Helper Holds one XY joint on its carriage while you land the other.
What you're looking at
The X axis drops onto the two Y carriages, the sliding blocks on the Y rails. Tilting it lets you land one joint at a time; lowering it flat means fighting both carriages at once, and a carriage shoved off its rail is ruined.
Source: Voron manual p.106