Step 07.34 — Insulate the probe and keep its lead whole¶
Step 34 of 39 · Chapter 07 — A/B belts and tensioning
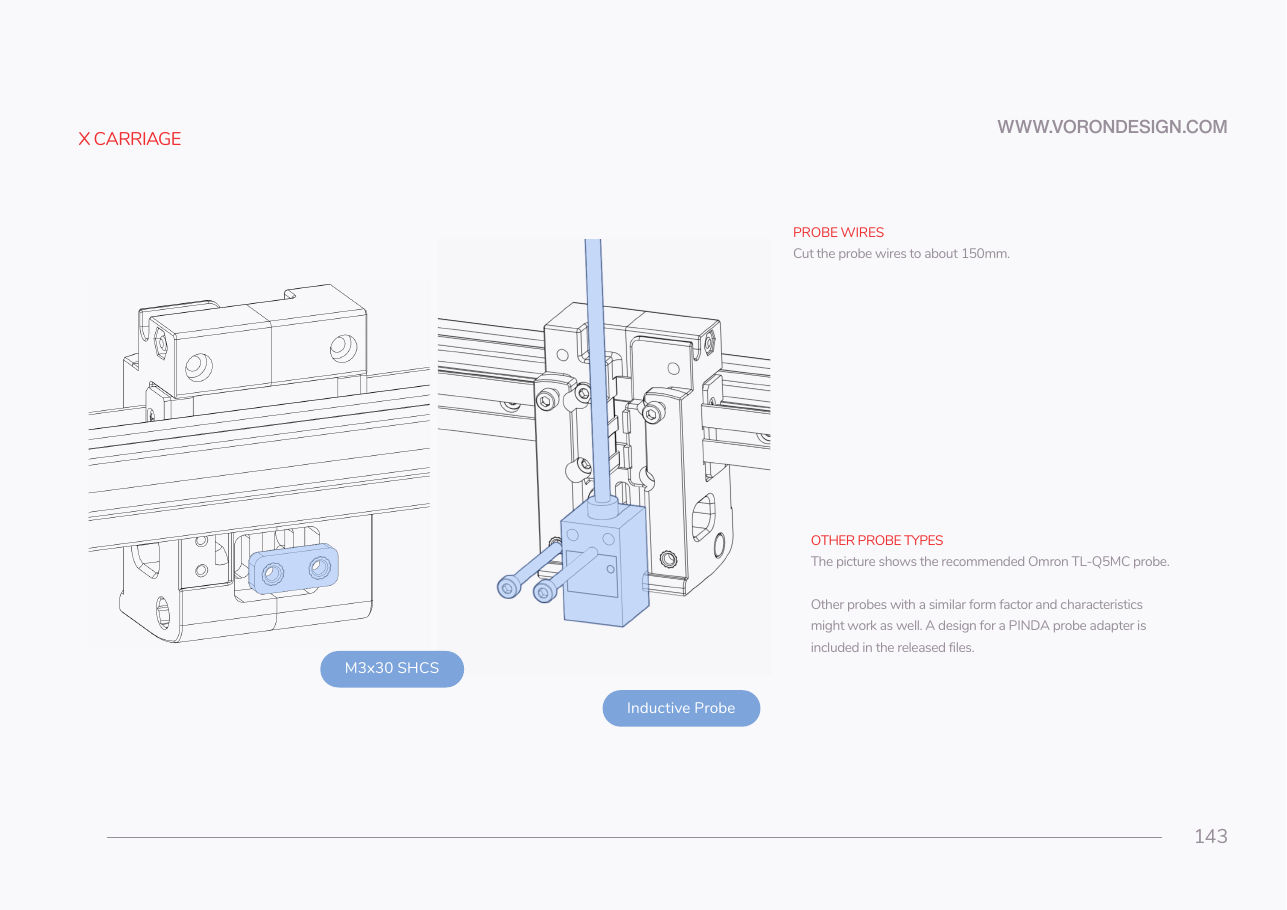
Tap to enlarge
 Gather for this segment — steps 07.34–07.39
Cable Kit 2.4-350 box
- Omron TL-Q5MC inductive probe ×1
Fasteners, Tools & Misc box
- M3×30 SHCS ×2
Printed parts
[a]_cable_cover×1 · bin 07-X
Tools and consumables
- fibreglass tape 2×12 cm
Already on the bench
- the probe retainer bracket
Parts:
- Omron TL-Q5MC inductive probe ×1, in the Toolhead PCB Cables bag · set out now, fitted later
- fibreglass tape 2×12 cm · consumable
Do:
- Wrap at least two layers of fibreglass tape round the front and sides of the block, set slightly up from the bottom edge.
- Leave the lead full length and coil the spare loosely.
 Check
Back and bottom sensing face bare; mounting holes clear; lead uncut with its connector on.
What you're looking at
The inductive probe is a small rectangular block with two mounting holes at the top and a lead out of it. It senses the steel bed without touching it, for QGL and the bed mesh.
Caution
Rev D+ / LDO: p.143's "cut the probe wires to about 150 mm" does not apply. This kit's probe lead comes pre-cut and crimped for the Nitehawk PROBE port, Step 08.50. Tape before fitting; too much tape stops the probe triggering, so peel some off if it fails in Ch 13. src
Source: Voron manual p.143 · LDO Build Notes § Voron 2.4 build FAQ · LDO wiring guide § Insulating the Z probe · LDO 350 Rev D BOM