Step 08.6 — Inserts: CW2 chain anchor (Igus 2-hole pattern)
Step 6 of 65 · Chapter 08 — Toolhead: Stealthburner, Clockwork 2, Revo HF, Nitehawk-SB V2
Tap to enlarge
Parts:
- CW2 Chain Anchor Tilted ×1 · set out now, fitted later
- heat-set insert, M3×5×4 ×3 · Fasteners, Tools & Misc box
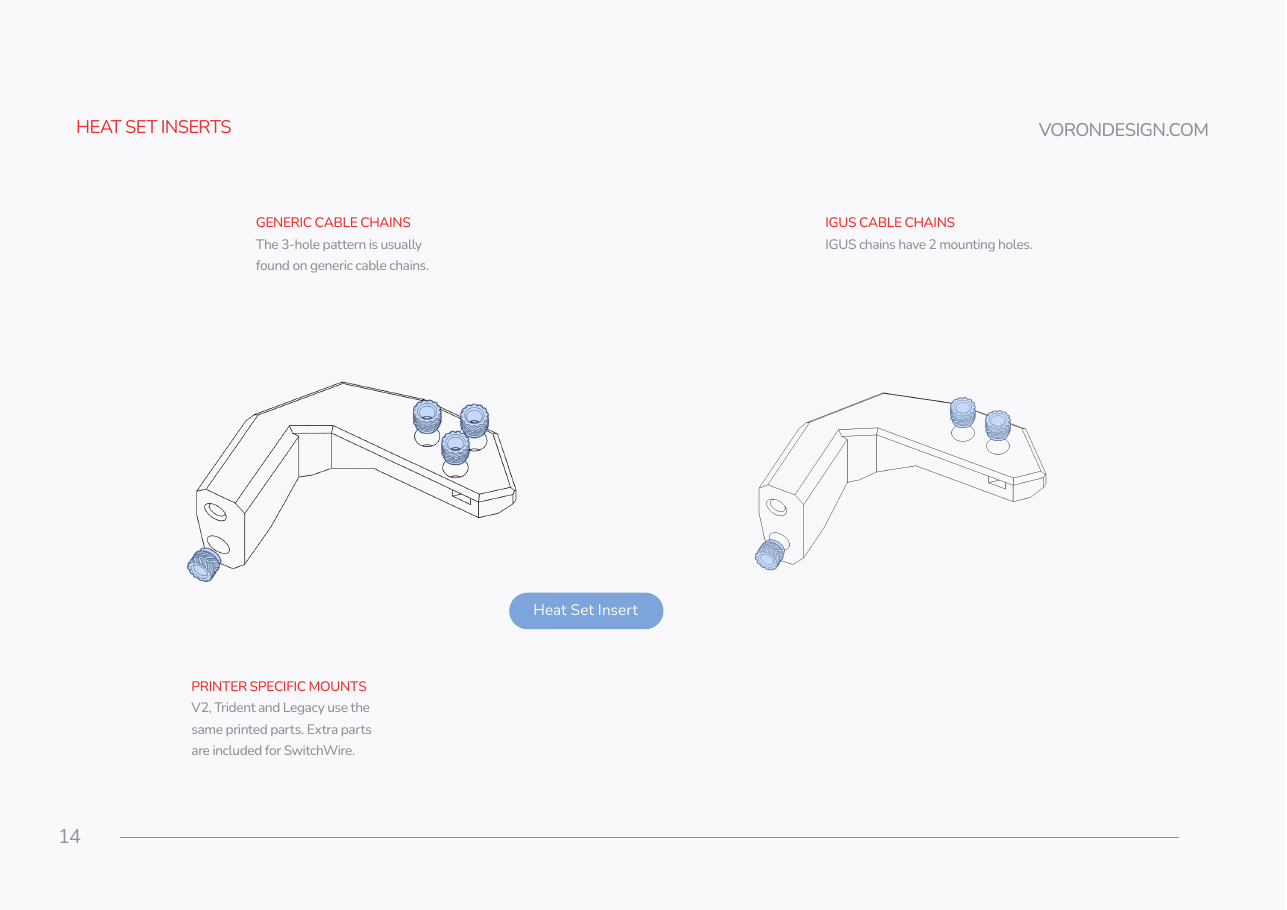
Do: SB p.14 shows two anchor variants. Your kit ships Igus-pattern 2-hole drag chain, so use the two-hole row: two inserts along the top face plus one in the front tab that bolts to the extruder. Ignore the three-hole pattern.
Check
Offer a chain end plate to the anchor: its two screw holes line up over your two inserts. Count: 3 (verify on bench).
What you're looking at
The chain anchor is the block on the back of the extruder that the toolhead drag chain's end plate bolts to, so the chain pulls on plastic and not on the toolboard's connectors. Two hole patterns exist; this kit's is the IGUS two-hole.
Caution
Rev D+ / LDO: do not print or use Clockwork2/chain_anchor_2hole.stl. LDO supplies the tilted anchor printed, and the print plan lists the Voron file as deliberately not printed. Always take _2hole, never _3hole, anywhere in this build. src
Source: SB manual p.14