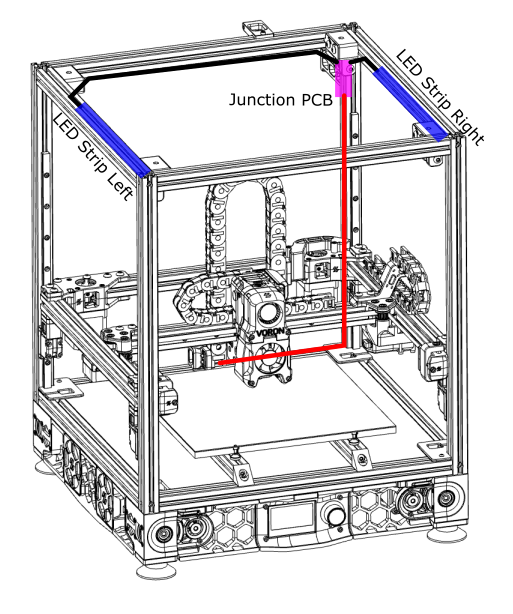
Step 10.36 — Mount the COB strips left and right¶
Step 36 of 80 with a helper · Chapter 10 — Wiring and Checkpoint #1
Parts:
- COB LED strip ×2 · the LDO kit, box not in the Rev D BOM
- the eight assembled COB mounts · already on the bench
- M3×8 SHCS ×16 · Fasteners, Tools & Misc box
- M3 hammerhead T-nut ×16 · Fasteners, Tools & Misc box
Do:
- Slide four mounts into the top-left extrusion's inner face and four into the top-right, evenly spaced.
- Fasten each with two M3×8 SHCS into hammerhead nuts. Press the strips into their channels, leads to the rear.
 Check
Both strips are level, fully seated, and their leads meet near the rear centre of the ceiling with slack to spare.
 Helper Holds each COB mount in place on the top extrusion while the adult drives its screws.
What you're looking at
The strips go on the inner faces of the two top side extrusions, aimed down into the chamber. The diagram is LDO's routing plan for both strips and for the leads that meet at the rear.
Source: LDO wiring guide § Routing the LED strips · LDO wiring photo led_route.png