Step 01.18 — Set the bed extrusions and start the fasteners
Step 18 of 22 · Chapter 01 — Frame
Tap to enlarge
Parts:
- the two bracketed bed extrusions · already on the bench
- M5×10 BHCS ×4 · Fasteners, Tools & Misc box
- M5 precision spacer ×4 · Fasteners, Tools & Misc box
Do:
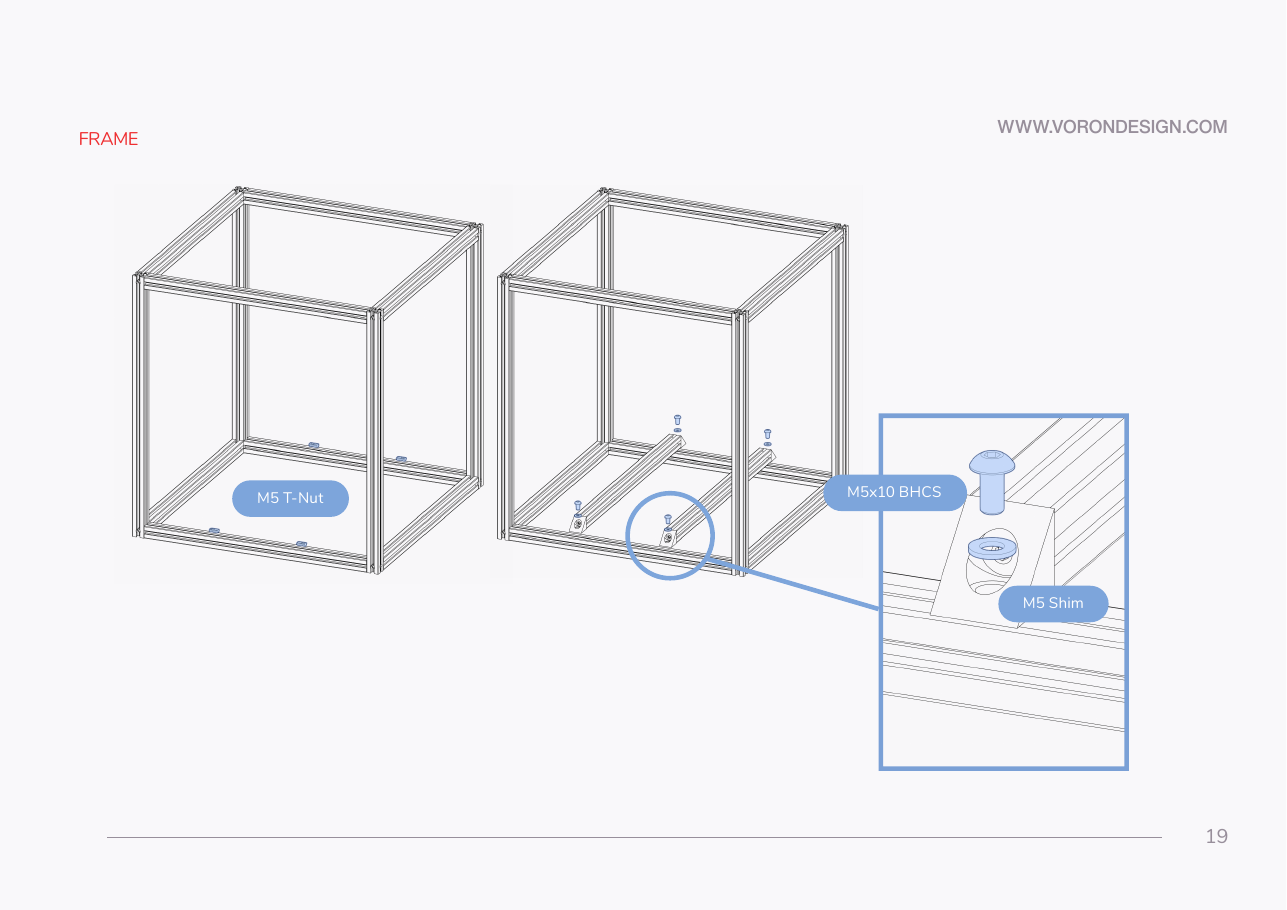
- Set the bed extrusions front-to-back, bracket legs on the rails over T-nuts. Move the FRONT tape if parallel to the bed extrusions.
- Drop a precision spacer on each hole and start an M5×10 BHCS into the T-nut, finger-loose.
 Check
Four bolts started, four spacers seated, ends flush with the rails' inner faces, undersides level with the rails' top faces.
What you're looking at
Manual p.19 shows both bed extrusions in the frame, each bracket leg on a rail over a T-nut, with an M5 precision spacer under each bolt head. The brass spacer is a controlled thickness that sets stack height, not a washer, see glossary.
Caution
Rev D+ / LDO: the manual calls this part an "M5 Shim" (p.19). This kit supplies a brass M5 precision spacer instead, for every M5 shim in the manual from here on. LDO: "The brass M5 Precision Spacer are used in place of the M5 Shim. This will be for all M5 Shims in the guide unless noted." src
Source: Voron manual p.19 · LDO Build Notes (Rev D)