Step 01.19 — Position the bed extrusions on the centreline
Step 19 of 22 with a helper · Chapter 01 — Frame
Tap to enlarge
Parts: none.
Do:
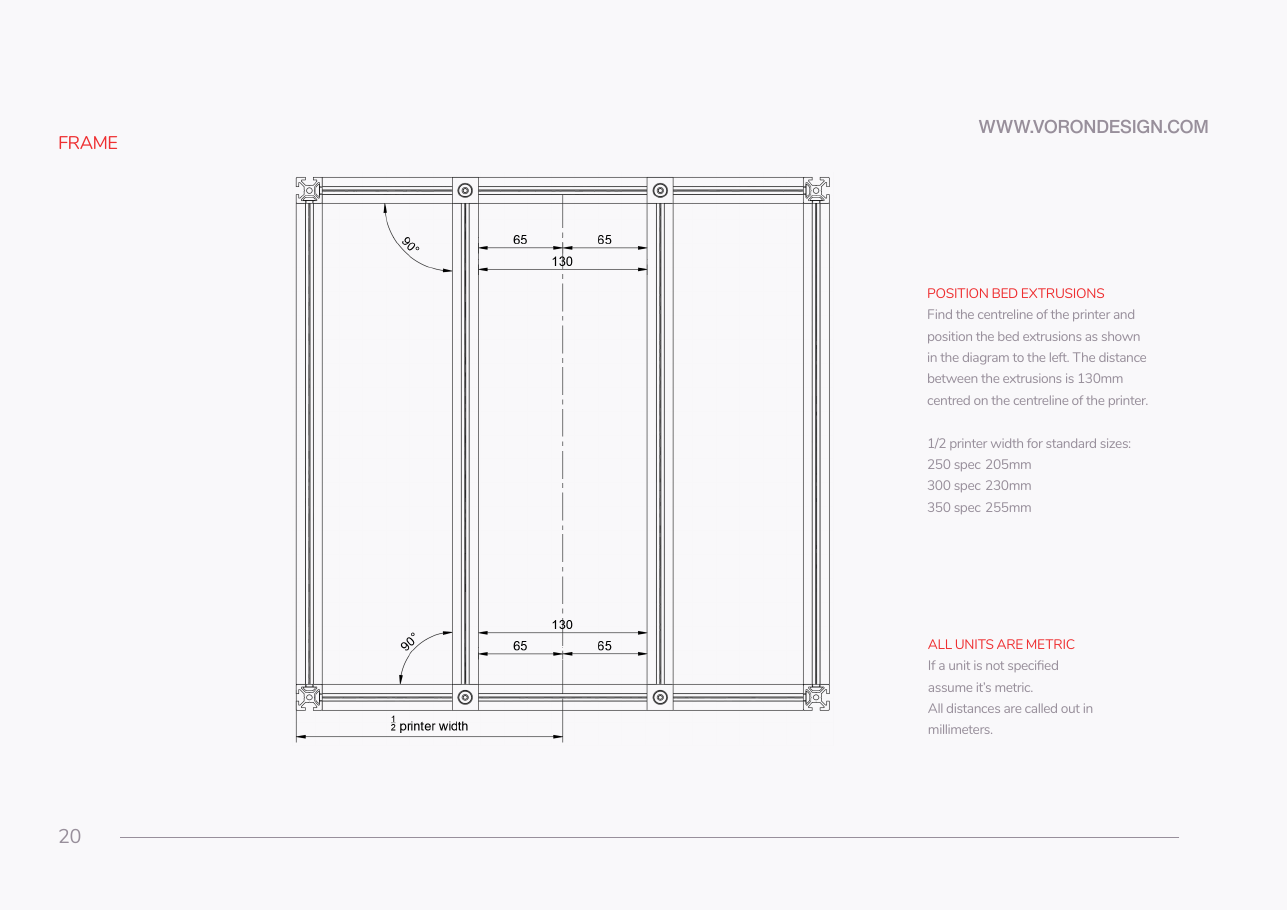
- Mark the centreline 255 mm from the left rail's outer face, front and rear.
- Slide each bed extrusion's inner face to 65 mm from that line.
- Tighten the M5×10, then the M5×16, brackets flush with their extrusions.
 Check
65 mm each side of the centreline at both ends of both extrusions, four equal measurements, and both extrusions read 90° to the rails.
 Helper Holds the tape on the centreline mark and reads each 65 mm aloud.
What you're looking at
Manual p.20 shows the two bed extrusions set symmetrically about the printer's centreline. Their spacing puts the build plate's mounting points where the plate's own holes are, so measure it at both ends of both extrusions.
 Tip
p.20's dimension lines land on the facing inner faces: 130 mm clear, 150 mm centre to centre. If the bed's holes disagree later, trust the bed.
 Good stopping point · ~35 min since the last one
both bed extrusions are bracketed, spaced with brass M5 precision spacers, set 65 mm each side of the centreline, their four M5×10 and four M5×16 tightened. Nothing is half-fastened. Do not fit the titanium backers, and do not move the frame off the stone yet — Step 01.20 re-checks squareness there.
Source: Voron manual p.20 · Voron manual p.58 · Video: Part 1 @1:46:36