Step 08.27 — Assemble the Revo HF hotend
Step 27 of 65 · Chapter 08 — Toolhead: Stealthburner, Clockwork 2, Revo HF, Nitehawk-SB V2
Tap to enlarge
 Gather for this segment — steps 08.27–08.32 (~20 min)
Fasteners, Tools & Misc box
- M3×16 SHCS ×2
- M3×8 SHCS ×4
Other box
- E3D Revo HF hotend, assembled ×1
Printed parts
stealthburner_printhead_revo_voron_front×1 · bin 08-SB
Tools and consumables
- PTFE tube, 4 mm OD, 2 mm ID, 10 cm
- caliper
- flush cutters
Already on the bench
- the rear printhead half with its inserts
- the Revo in the rear half
Parts:
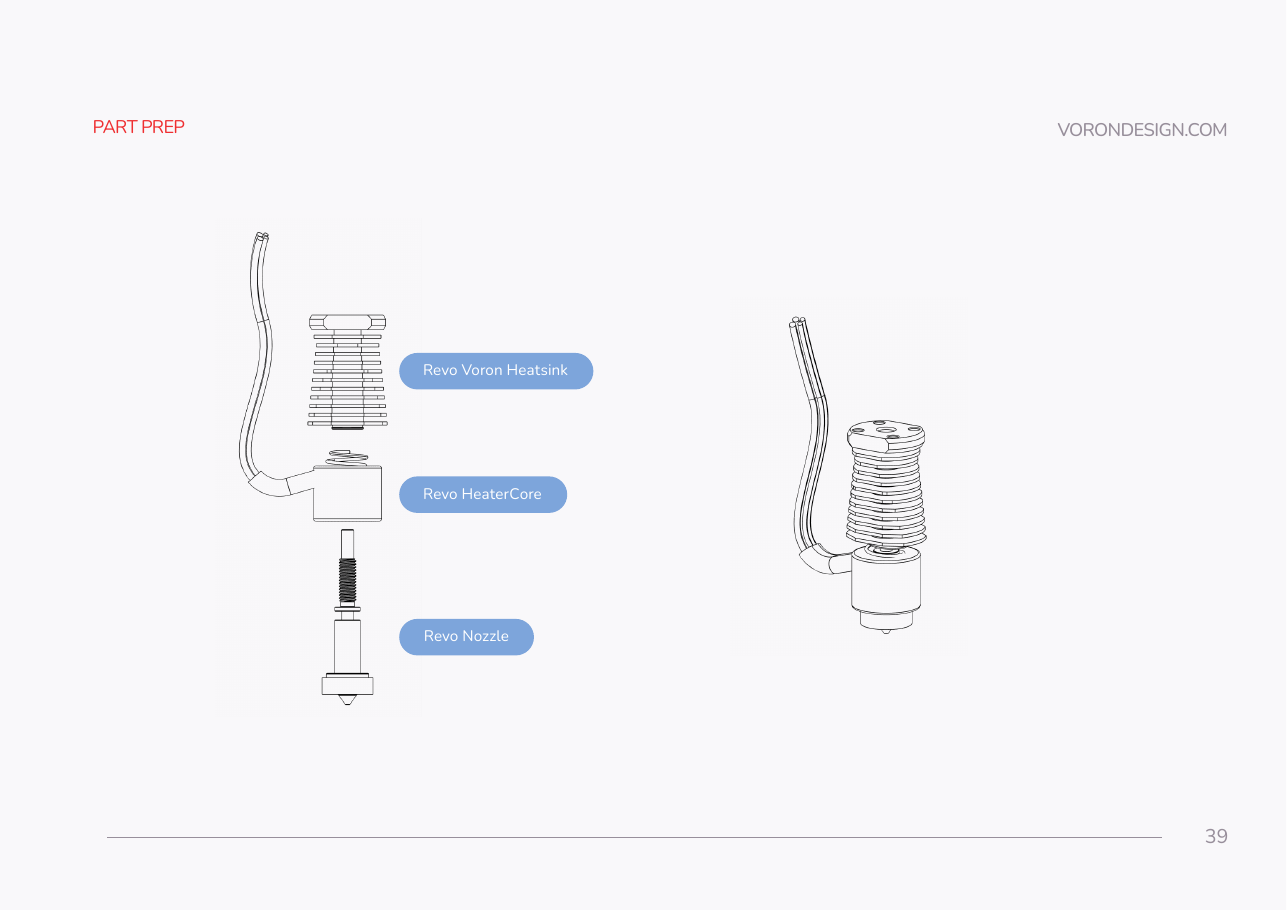
- Revo Voron heatsink · set out now, fitted later
- Revo retaining spring · set out now, fitted later
- Revo HeaterCore · set out now, fitted later
- Revo nozzle · set out now, fitted later
Do:
- Fit the spring into the groove on the heatsink's bottom and push the HeaterCore on.
- Screw the nozzle in finger-tight only, no tools.
- Aim the cables by rotating the HeaterCore anti-clockwise only; clockwise disengages the spring.
 Check
Nozzle fully home and hand-tight. HeaterCore captive under spring load. Cables pointing to the rear.
What you're looking at
The Revo HF is E3D's quick-change hotend in three pieces: the heatsink, the finned top the filament enters; the HeaterCore, heater and thermistor in one module; and a nozzle that screws in by hand. A retaining spring holds the HeaterCore captive.
Source: SB manual p.39 · E3D Revo Voron support