Step 09.29 — Fit the 5 mm shaft and its retaining set screw¶
Step 29 of 36 with a helper · Chapter 09 — Electronics bay
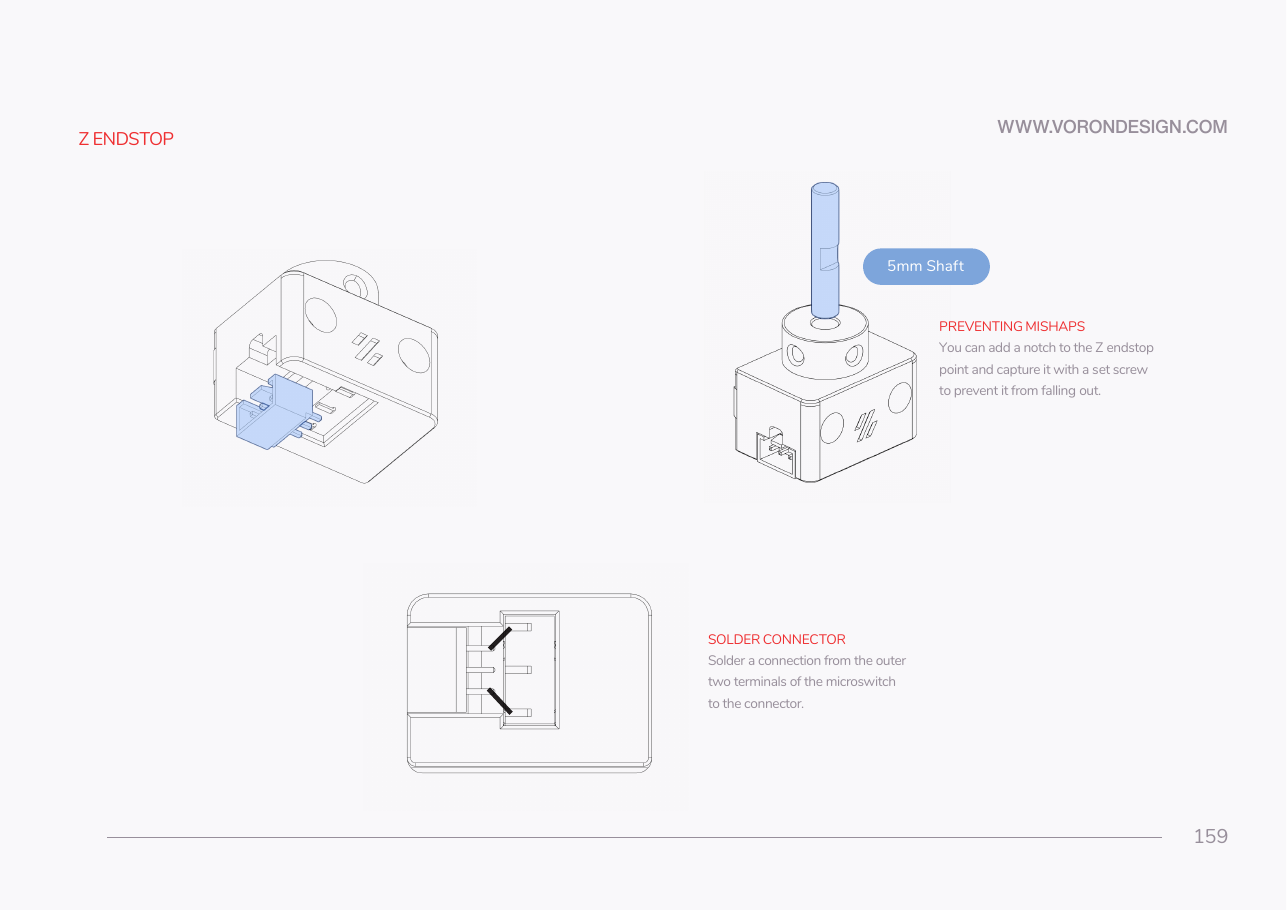
Tap to enlarge
Parts:
- nozzle probe shaft, 5 mm ×1 · Motion box
- M3×2 set screw ×1 · Fasteners, Tools & Misc box
Do:
- Drop the 5 mm shaft through the bore onto the switch plunger.
- Run the collar's set screw in until it just retains the shaft, still sliding freely.
- If unnotched, stop the screw short of the shaft.
 Check
Released, the shaft drops freely and clicks the switch. Upside down, a notched shaft stays put, an un-notched one may slide.
 Helper Releases the shaft and says whether it drops freely and clicks the switch.
What you're looking at
The 5 mm shaft is the part the nozzle actually touches. The single set screw only has to stop it falling out. Any tighter and it clamps the shaft, and a shaft that will not drop under its own weight drifts Z zero.
Caution
Rev D+ / LDO: LDO: "Remember to install one set screw into the pulley, but do not overtighten it… it should not be so tight as to impede the shaft from freely moving up and down." Follow only the 5 mm shaft part of p.159 — the soldered-connector half of the page does not apply to the PCB version. src
Source: Voron manual p.159 · LDO wiring guide § Assembling the nozzle probe · LDO Build Notes § Voron 2.4 build FAQ