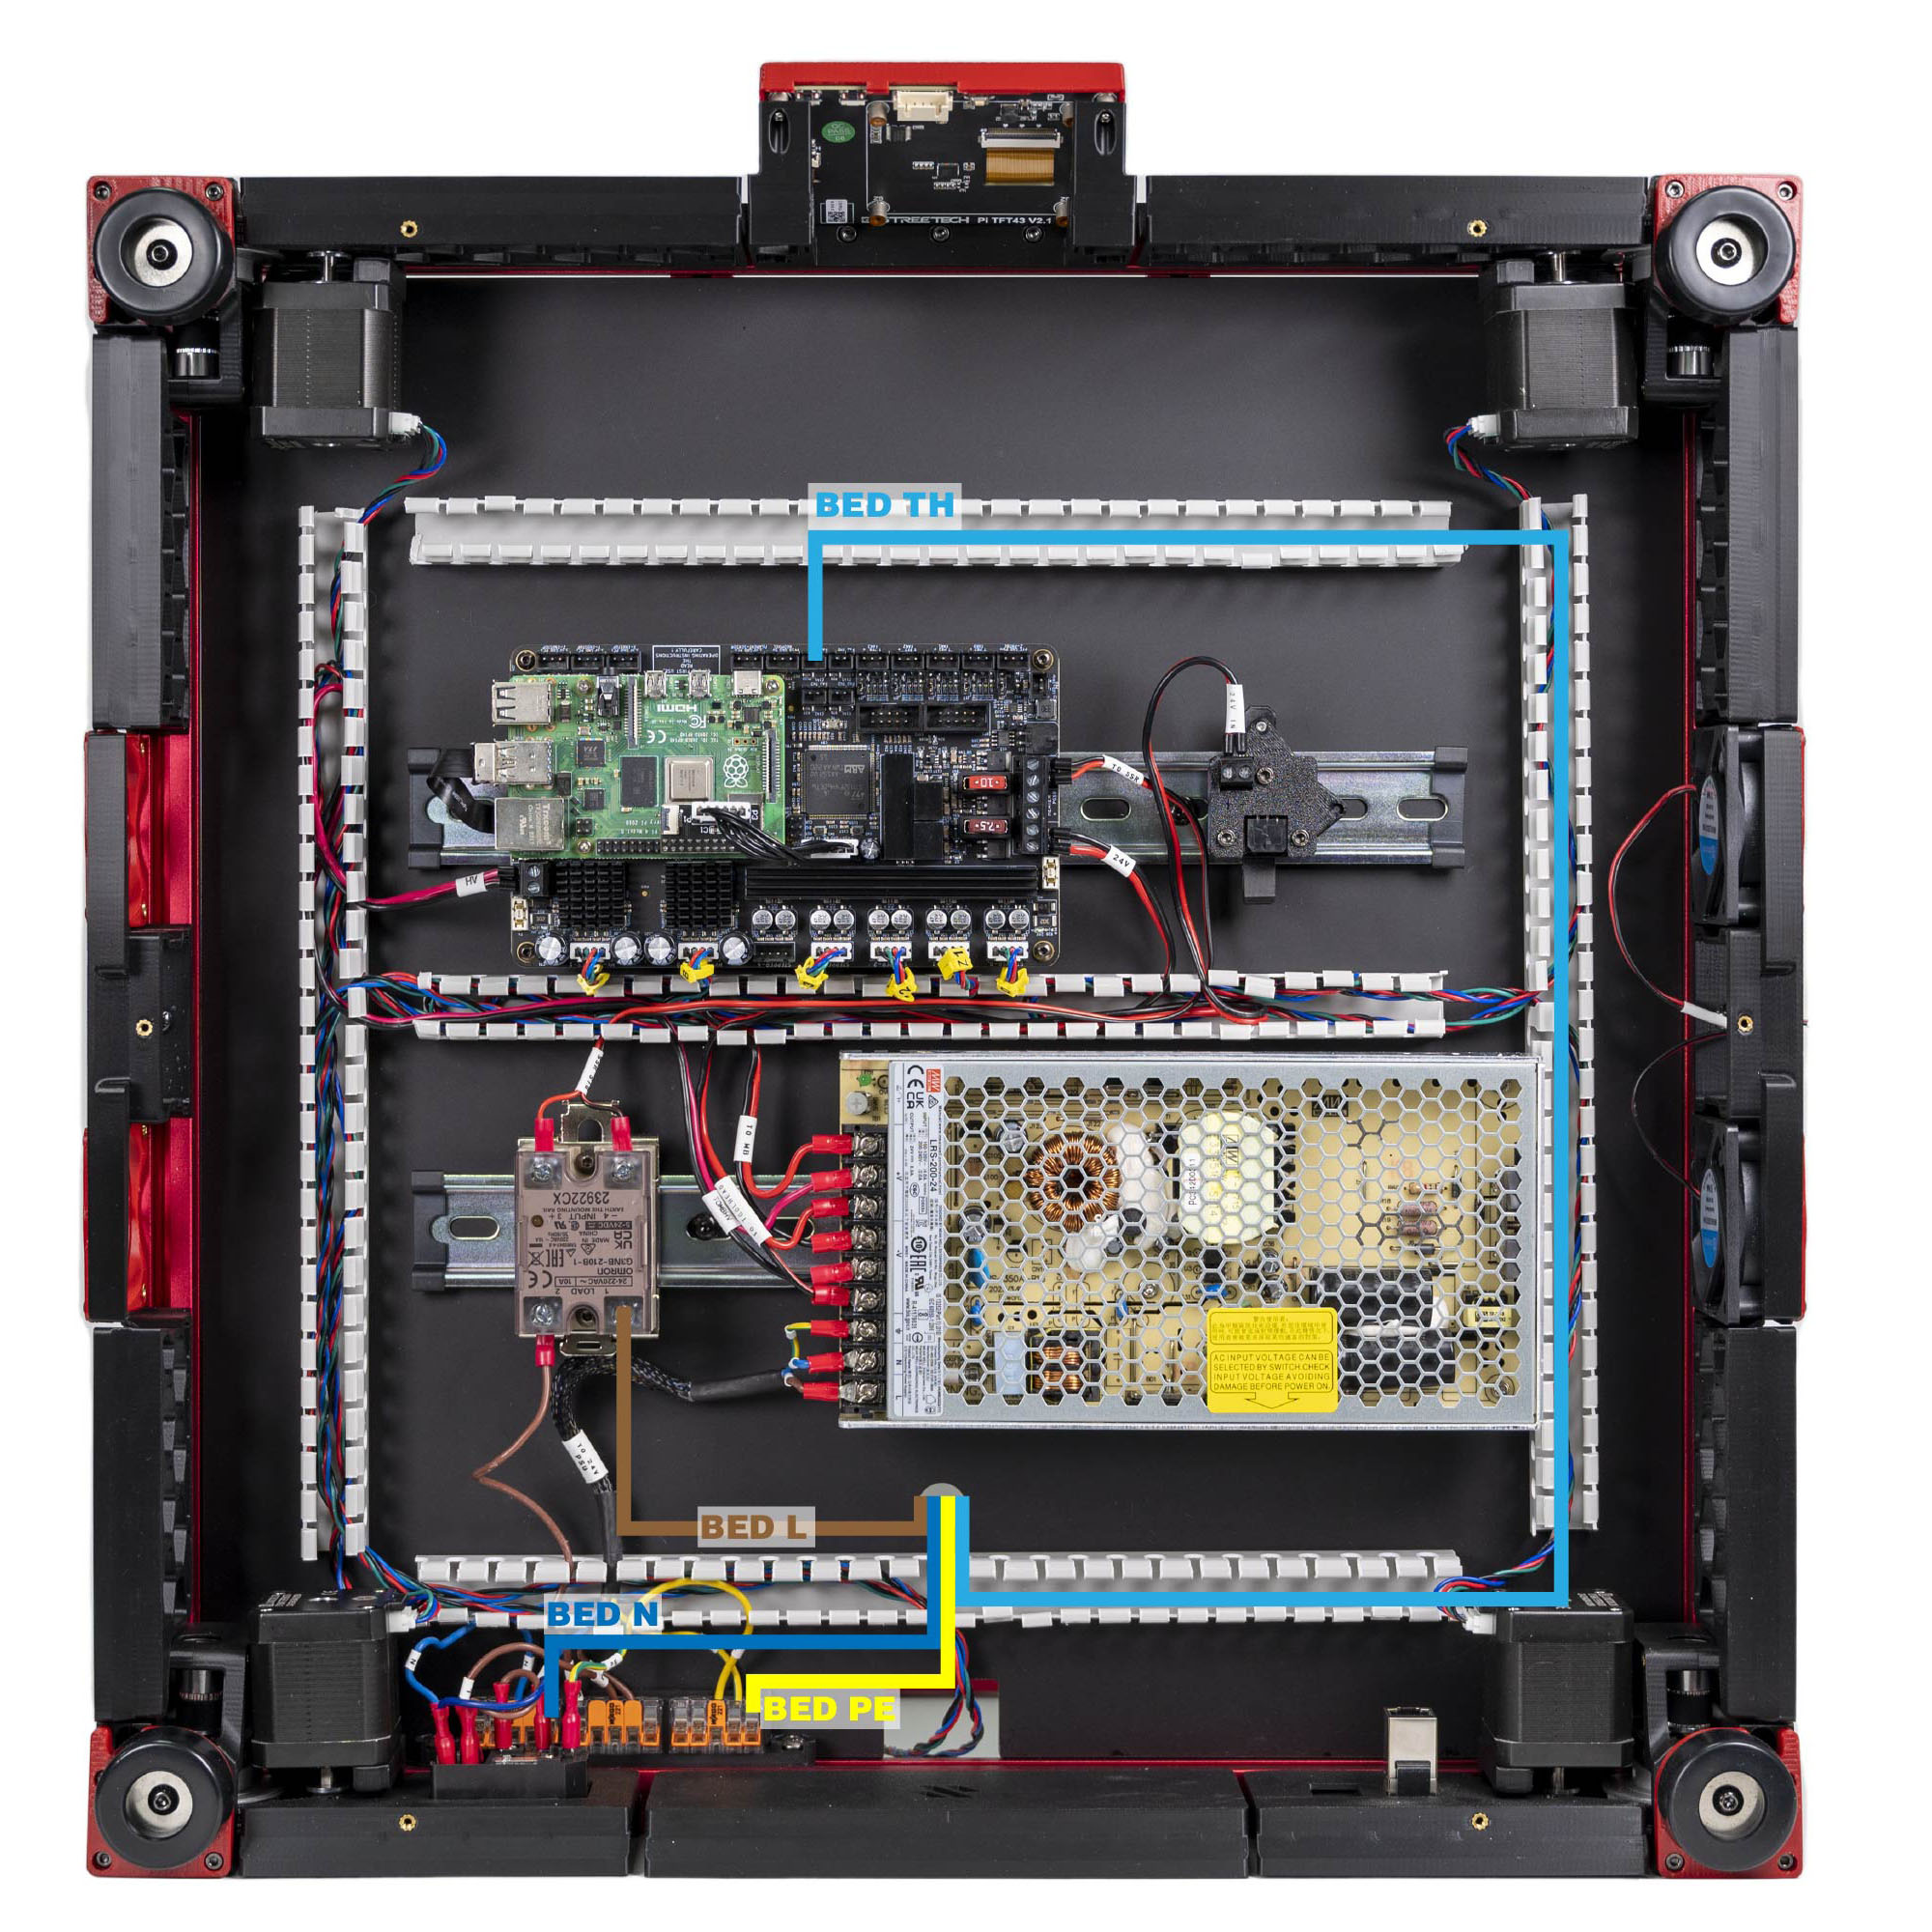
Step 10.44 — Bed thermistor → TH1¶
Step 44 of 80 · Chapter 10 — Wiring and Checkpoint #1
Parts:
- Bed TH cable ×1 · the Cable Kit box
Do: Lead it from the splicer over the deck, down the Z-chain notch and round the DC loop. Measure it, about 100 kΩ at 25 °C or 127 kΩ at 20 °C, then plug it into TH1. Polarity does not matter.
 Check
TH1, not TH0. TH0 is the hotend port and is unused on a Nitehawk build; the config reads the bed on PA2 = TH1.
What you're looking at
TH1 is a two-pin thermistor input. A thermistor is just a resistor whose value changes with temperature, so the port only measures resistance and there is no polarity to get wrong. The bed's sensor lands here; TH0 beside it is the hotend input, unused on this build.
Layout v3
the notch route adds about 44 mm; check spare during this fit (verify on bench). If short, make a longer Bed TH lead (2-pin JST-XH); a DC lead never enters the AC conduit. LDO layout: up the round hole, then LDO's rear, right and front PVC ducts to TH1, as the photo shows. LDO § Connecting build plate
Source: LDO Rev D photo S5 build-plate mapping · LDO wiring guide § Connecting build plate · LDO Leviathan V1.3 guide (manual p.9)