Step 10.60 — Fit the Y drag chain
Step 60 of 80 · Chapter 10 — Wiring and Checkpoint #1
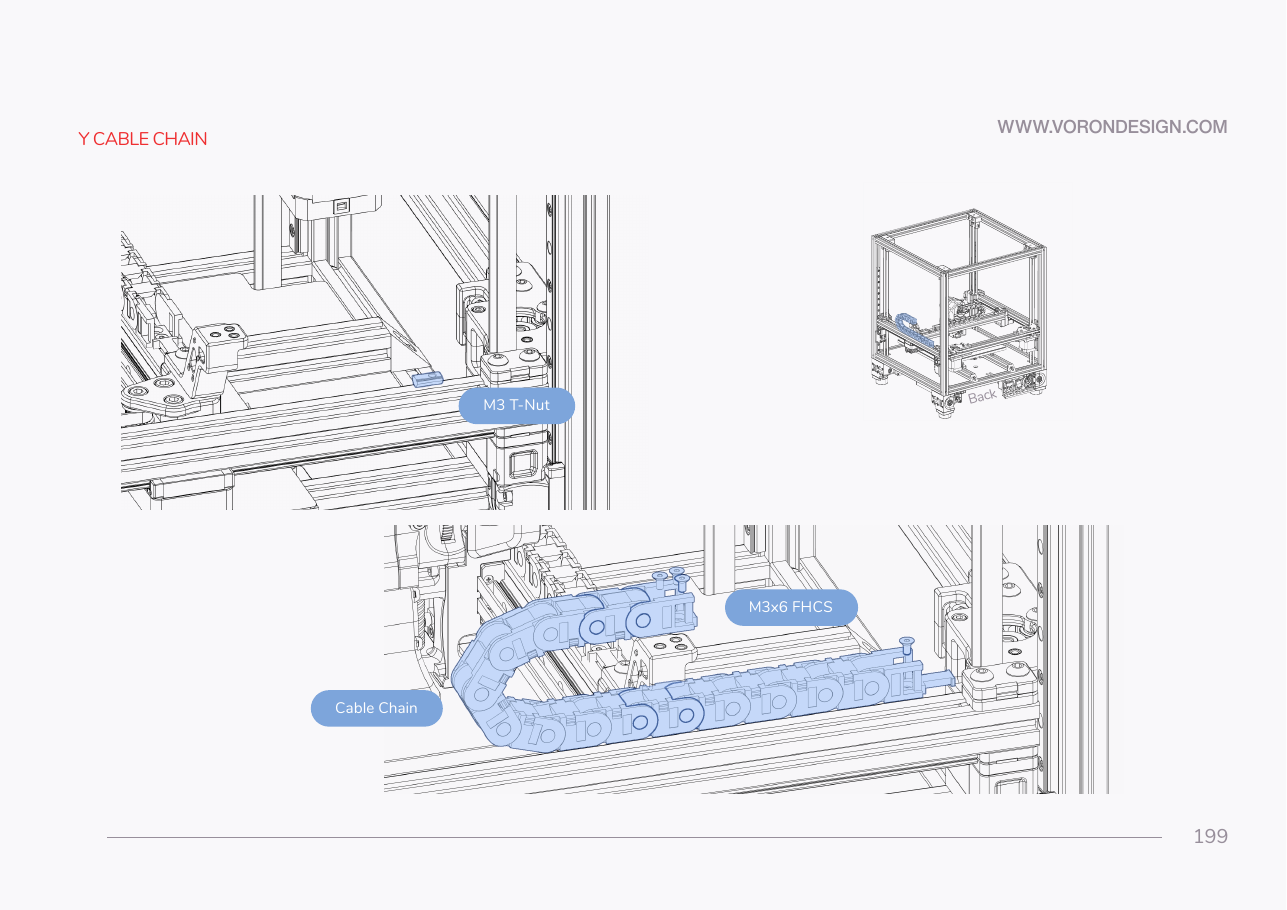
Parts:
- drag chain 10×10 R18 ×1 · Belts, Chains & Fans box
- M3 roll-in T-nut ×1 · Fasteners, Tools & Misc box
- M3×6 FHCS ×3 (verify on bench) · Fasteners, Tools & Misc box
- small zip tie ×2 · consumable
Do:
- T-nut into the right Y extrusion, chain fixed end onto it with one M3×6 FHCS, moving end onto the right XY joint's cable bridge with two.
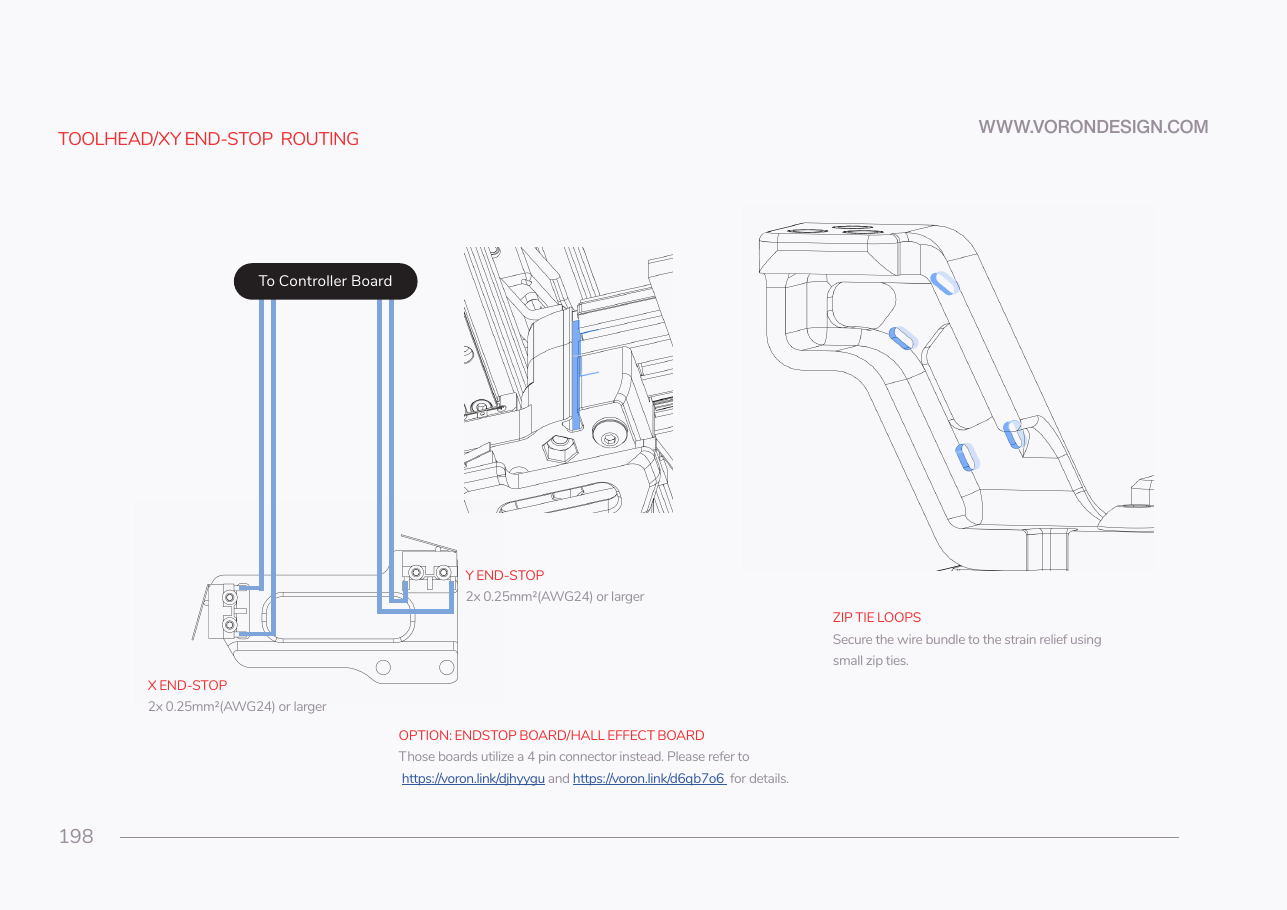
- Secure the bundle to the chain's strain relief with small zip ties.
 Check
Run the gantry front to back over full Y travel: the chain articulates freely and the loop stays clear of the bed extrusions.
What you're looking at
The Y chain does the same job one level out: fixed to the right Y extrusion, moving with the right XY joint, so the toolhead umbilical and the endstop cable can travel front to back. Everything it serves lives on the right.
Caution
Rev D+ / LDO: ignore p.198's separate X and Y endstop wiring — the kit uses one 4-pin XY endstop PCB (LDO notes p.162, p.163, p.169). src
Source: Voron manual p.199 · Voron manual p.198 · LDO Build Notes p.198 · Video: Part 6 @0:39:55