Step 11.12 — Pre-load the skirt T-nuts
Step 13 of 67 with a helper · Chapter 11 — Skirts, panels, Clicky-Clack door, filtration
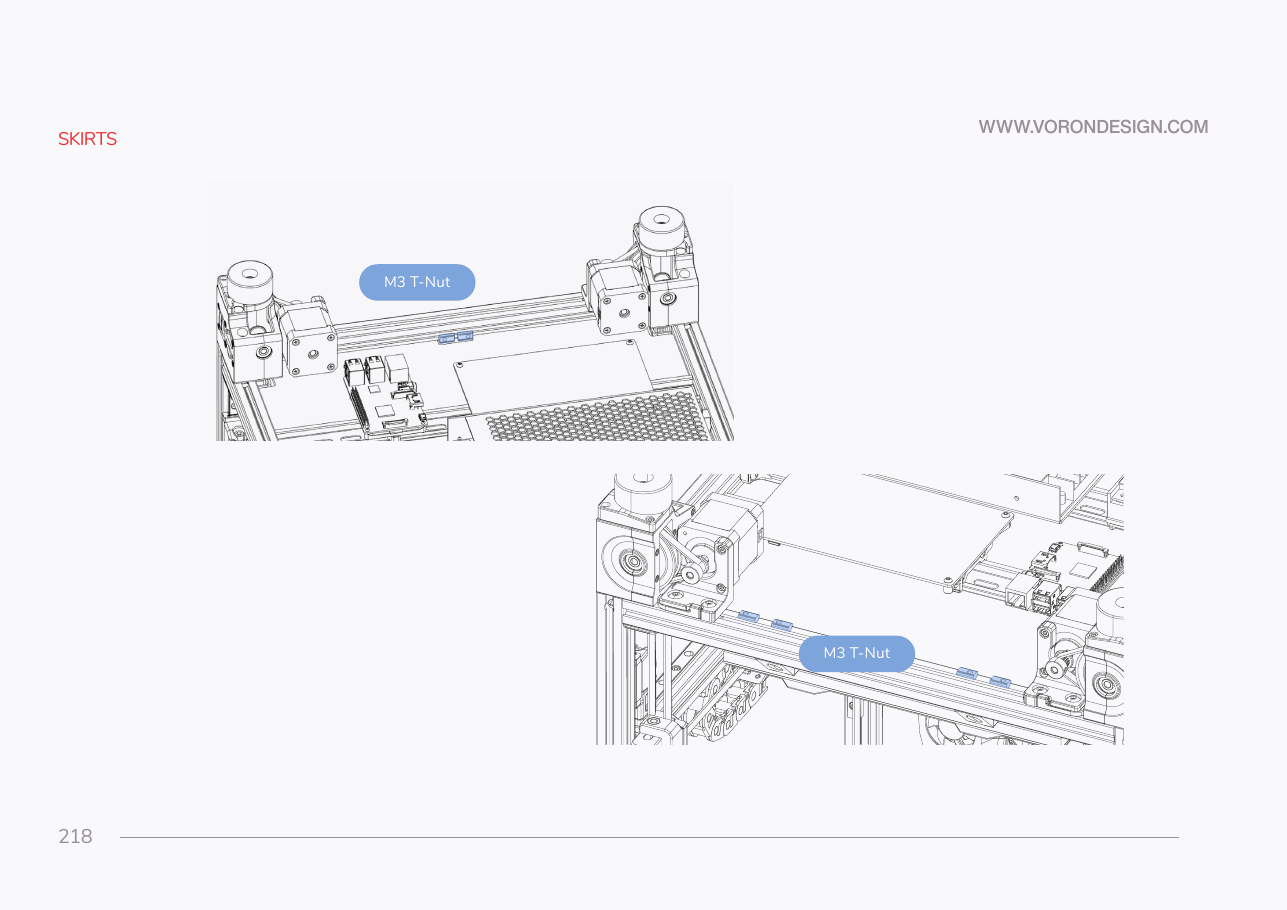
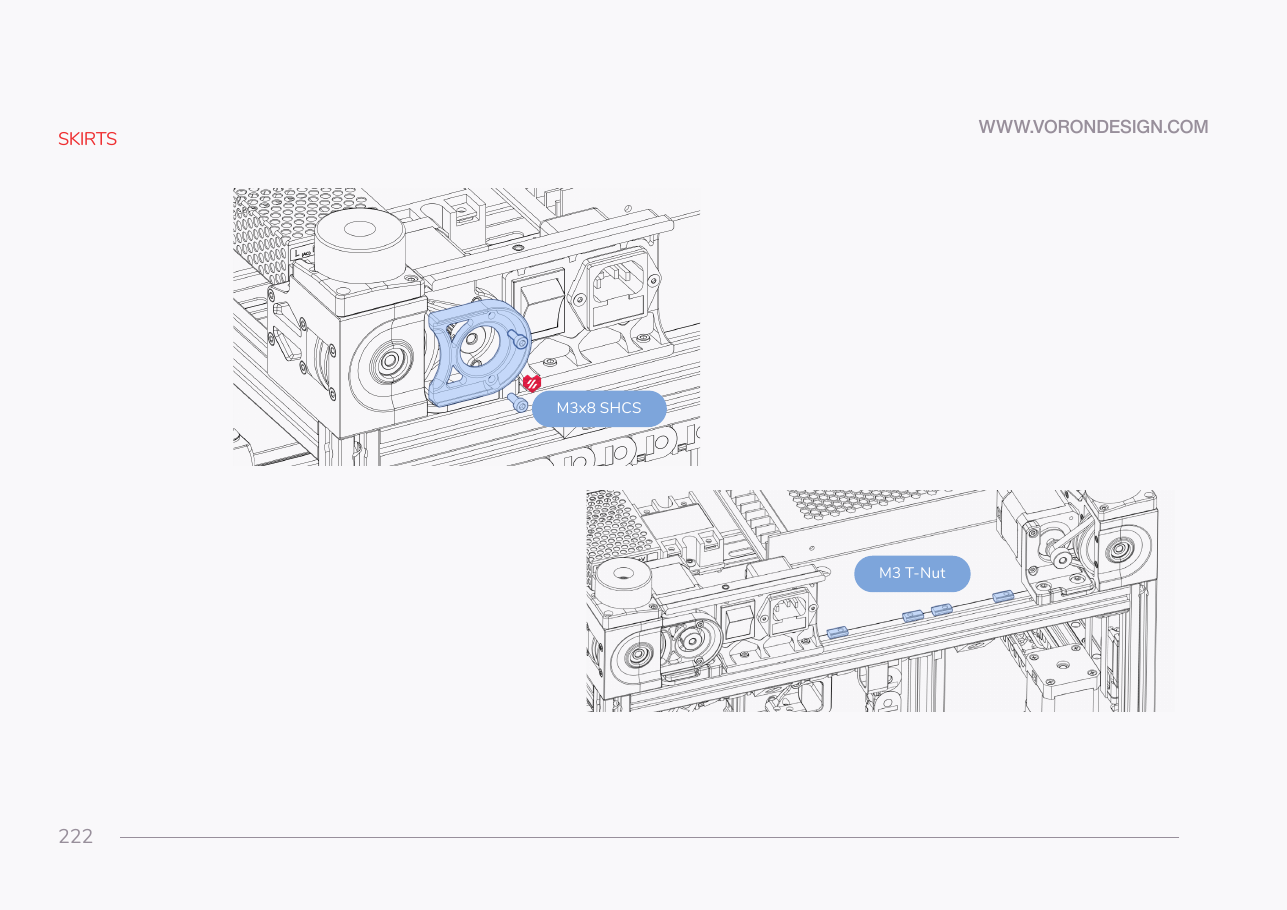
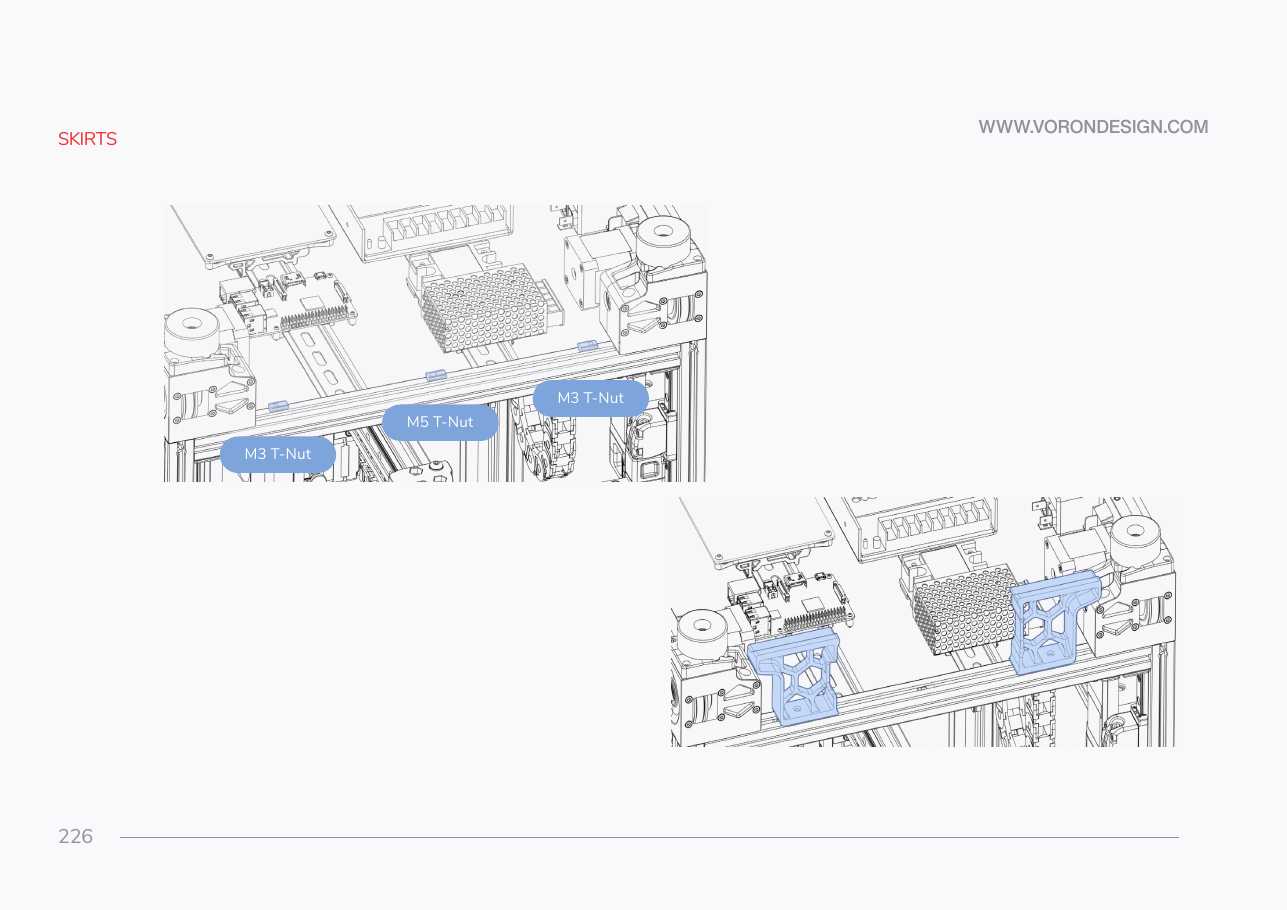
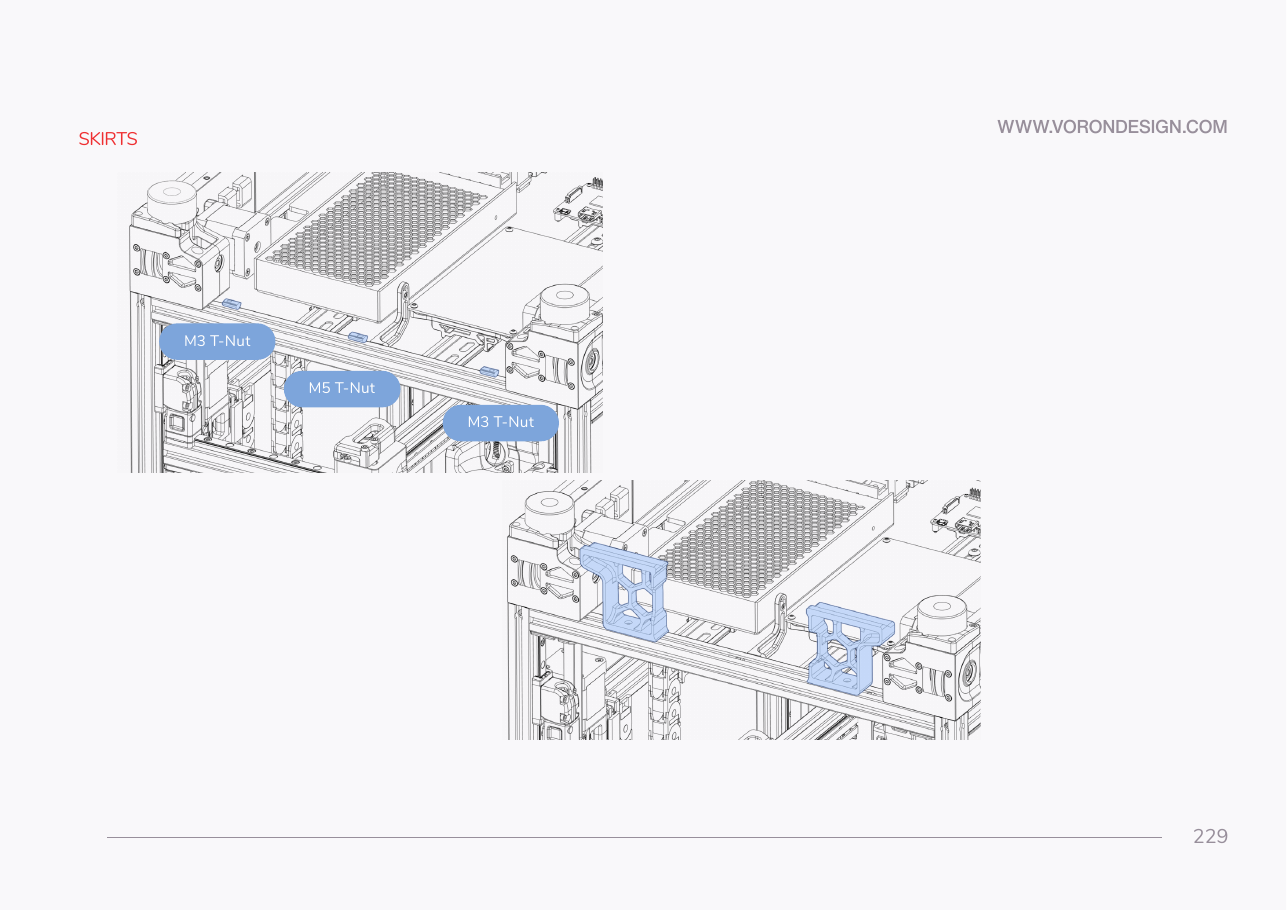
Parts:
- M3 roll-in T-nut ×12 · Fasteners, Tools & Misc box
- M5 roll-in T-nut ×2 · Fasteners, Tools & Misc box
Do:
- Roll every T-nut into the frame extrusions before any segment goes up, each loose at roughly its position.
- M3: four front, four rear, two per side. M5: one per side, between that side's two M3.
 Check
Every T-nut sits flat in its slot and slides with light finger pressure. None jammed, none dropped inside a closed extrusion end.
 Helper Counts twelve M3 and two M5 T-nuts into a tray and hands them over one at a time.
What you're looking at
A roll-in T-nut drops into an extrusion slot and rotates a quarter turn to lock, so it can be added after a frame is built. Once a skirt segment covers the slot, no nut can get in.
Caution
Rev D+ / LDO: "Due to the tight tolerances of the extrusions and roll-in t-nuts it is advisable to either test fit before assembly to identify the sides of the extrusions that fits the best or to pre-load the t-nuts into the extrusions." src
 Good stopping point · ~15 min since the last one
three belt guards on their segments (the fourth waits for the plug panel at 11.14), keystone panel populated, the right-hand fan support built with both fans and the left one with its two retainers, and every skirt T-nut pre-loaded in the right slot. The ring is still off the machine.
Source: Voron manual p.218 · Voron manual p.226 · Voron manual p.229 · LDO Build Notes p.218 · Video: Part 5 @4:24:04