Step 11.21 — Fit the bottom panel
Step 22 of 67 with a helper · Chapter 11 — Skirts, panels, Clicky-Clack door, filtration
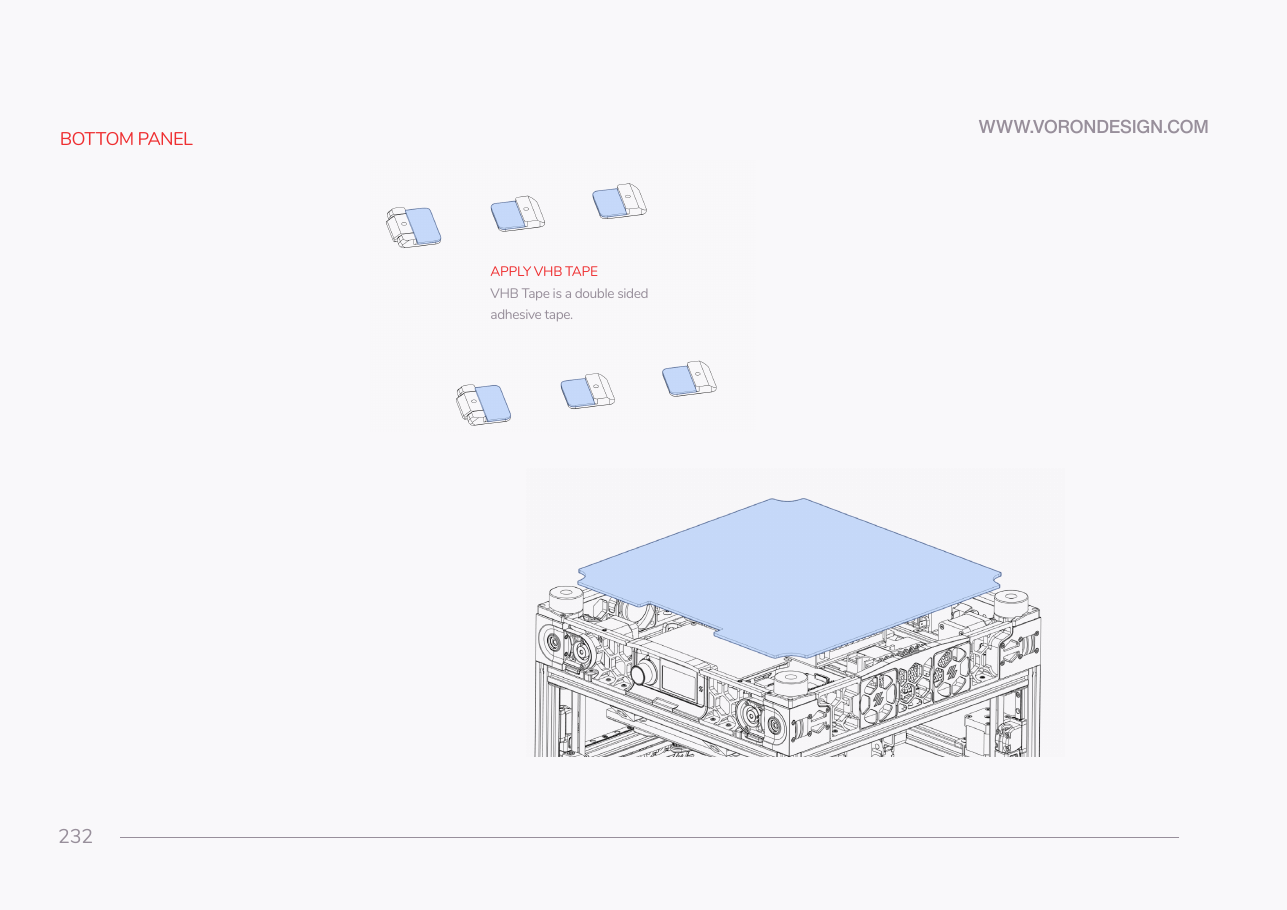
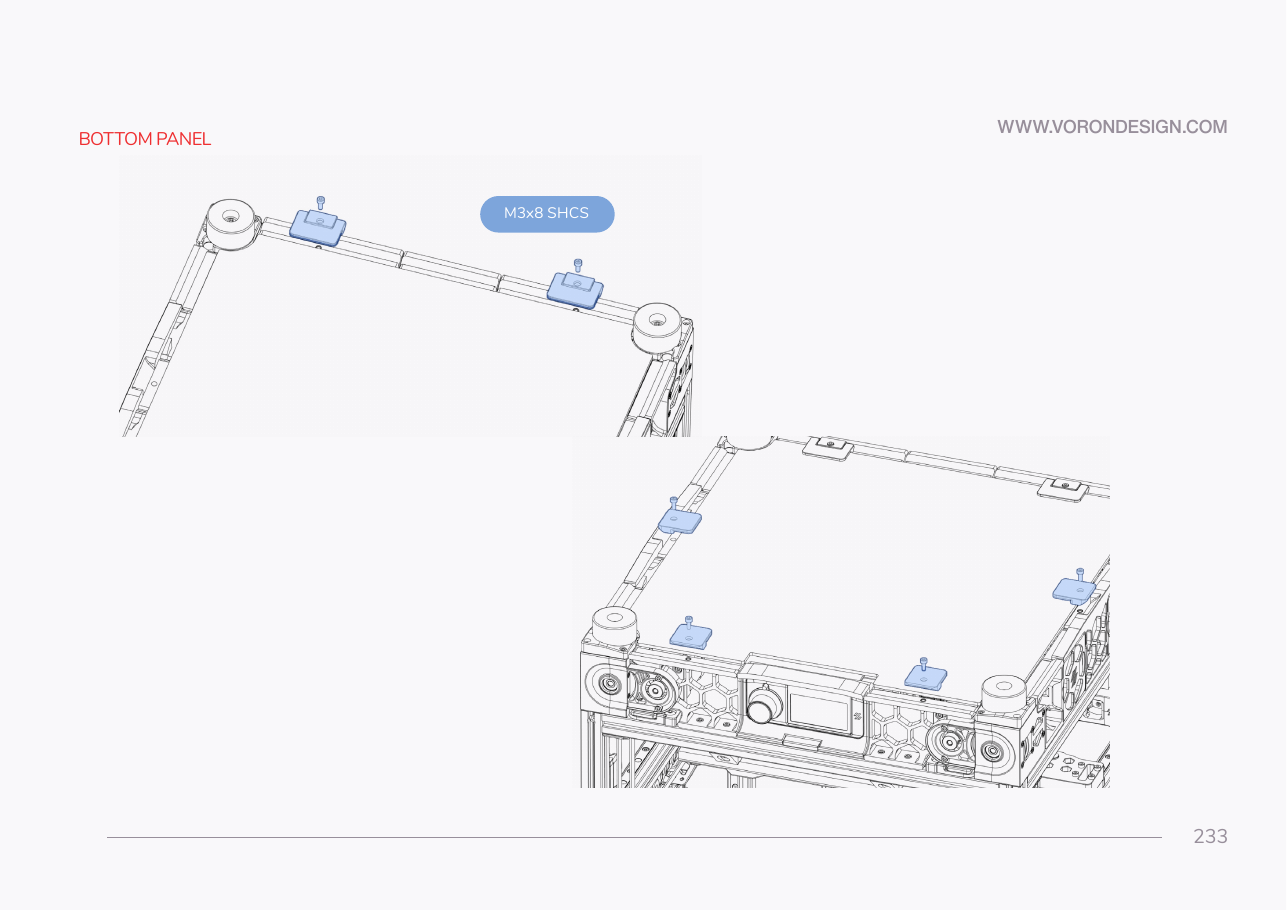
Parts:
- bottom panel, acrylic, black, 469×469×4 mm ×1 · Panel Kit box (carton 2)
- the six taped clips and hinges · already on the bench
- M3×8 SHCS ×6 · Fasteners, Tools & Misc box
Do:
- Screw each part into its skirt insert with one M3×8 SHCS: hinges rear, clips front and sides.
- Peel the film off both panel faces, pull the liners, and press the panel home, hinge edge at the rear.
 Check
Panel square, equal margins, no rock, every pad bonded. After an hour, release the front clips and swing it down, clearing the skirt ring.
 Helper Holds the panel square to the frame while you press it onto the pads.
What you're looking at
The bottom panel is the 4 mm acrylic floor of the electronics bay, and it is a door: VHB-bonded to two rear hinges and held by four snap clips, it unclips at the front and swings down for access through Ch 13.
Caution
Rev D+ / LDO: the bottom panel is the 4 mm acrylic, not the 3 mm deck panel. If you are holding a 469×469 panel and cannot tell which is which, caliper it — 3 mm is the deck (fitted back in Ch 02), 4 mm is this one. src
 Tip
swing the door with the machine still on its side or up on blocks; confirm every duct is reachable, then close it.
 Good stopping point · ~20 min since the last one
bay-fan wiring verified against Ch 10, bestagon insert decided, VHB pads pressed and the bottom panel hung on its rear hinges and front clips. Leave the VHB to cure undisturbed — do not swing the door open until it has; do not press a pad and walk away before the panel is on it.
Source: Voron manual p.232 · Voron manual p.233 · LDO Rev D 350 BOM · CAD: Voron 2.4r2 STEP @ de7e89d